Let’s face it – a very small number of web applications goes without forms. Just once in the life developers created a form for the app, whether a small one with 2 inputs for login or a large application form. To improve the form building process, we’d like to offer you our online form creator that will help with form elements arrangement and get a ready code on return.
A small tutorial already exists in our documentation that shows how to create forms with our free form builder tool, but today we’ll make a little bit larger registration form. Let’s begin with designer’s scratch:
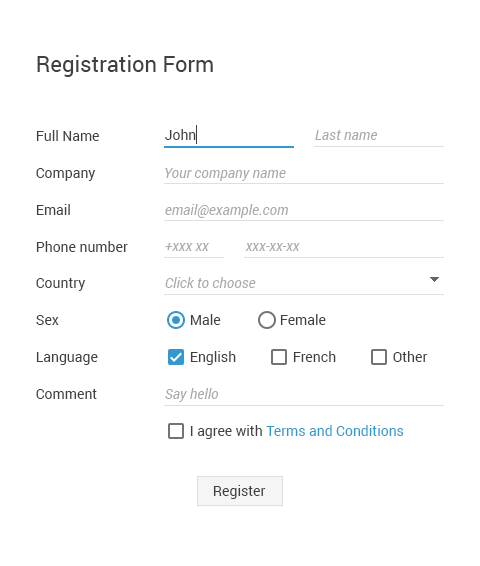
That’s the form we need for our application. Follow the instructions below to create such kind of form with us.
Preparations. First of all, let’s configure the settings block: we put the general data for our form, in particular we need:
labelAlign – left. Nevertheless, checkboxes and radio buttons require right (we’ll discuss it later)
labelWidth – 130
inputWidth – 270 (for the custom inputs)
offsetLeft – 0 (for the custom inputs)
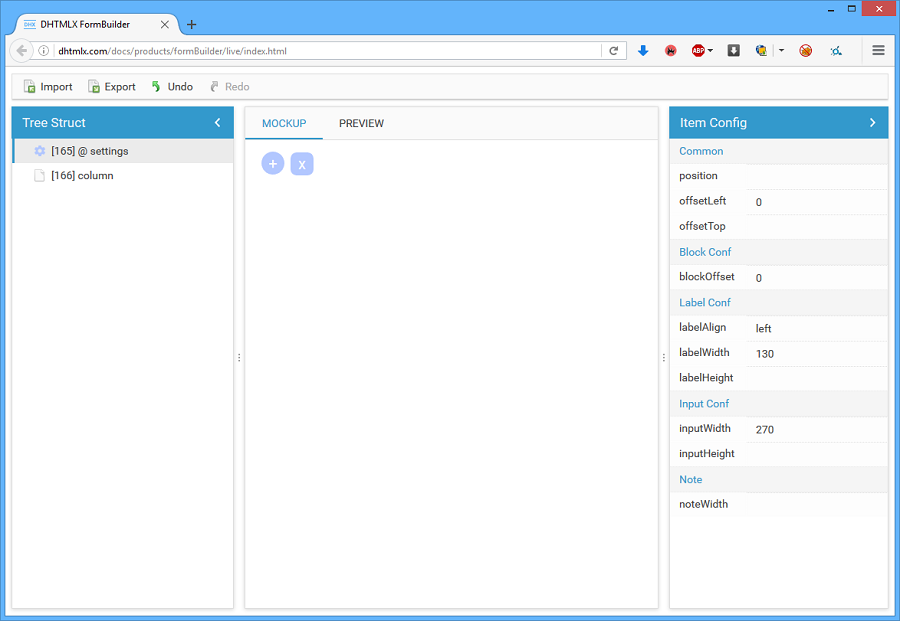
Full name field. The full name field contains two inputs. The best way to create this field is to divide it into 2 columns and unite into one block. It gives us the ability to arrange the rest of the elements below this block.
A new block requires the following settings:
inputWidth – 130
blockOffset – 0
Also we remove label of the second input and add offsetLeft:7
At the form building process, you may switch between Mockup and Preview tabs, it’ll show you whether you are on the right track or not.
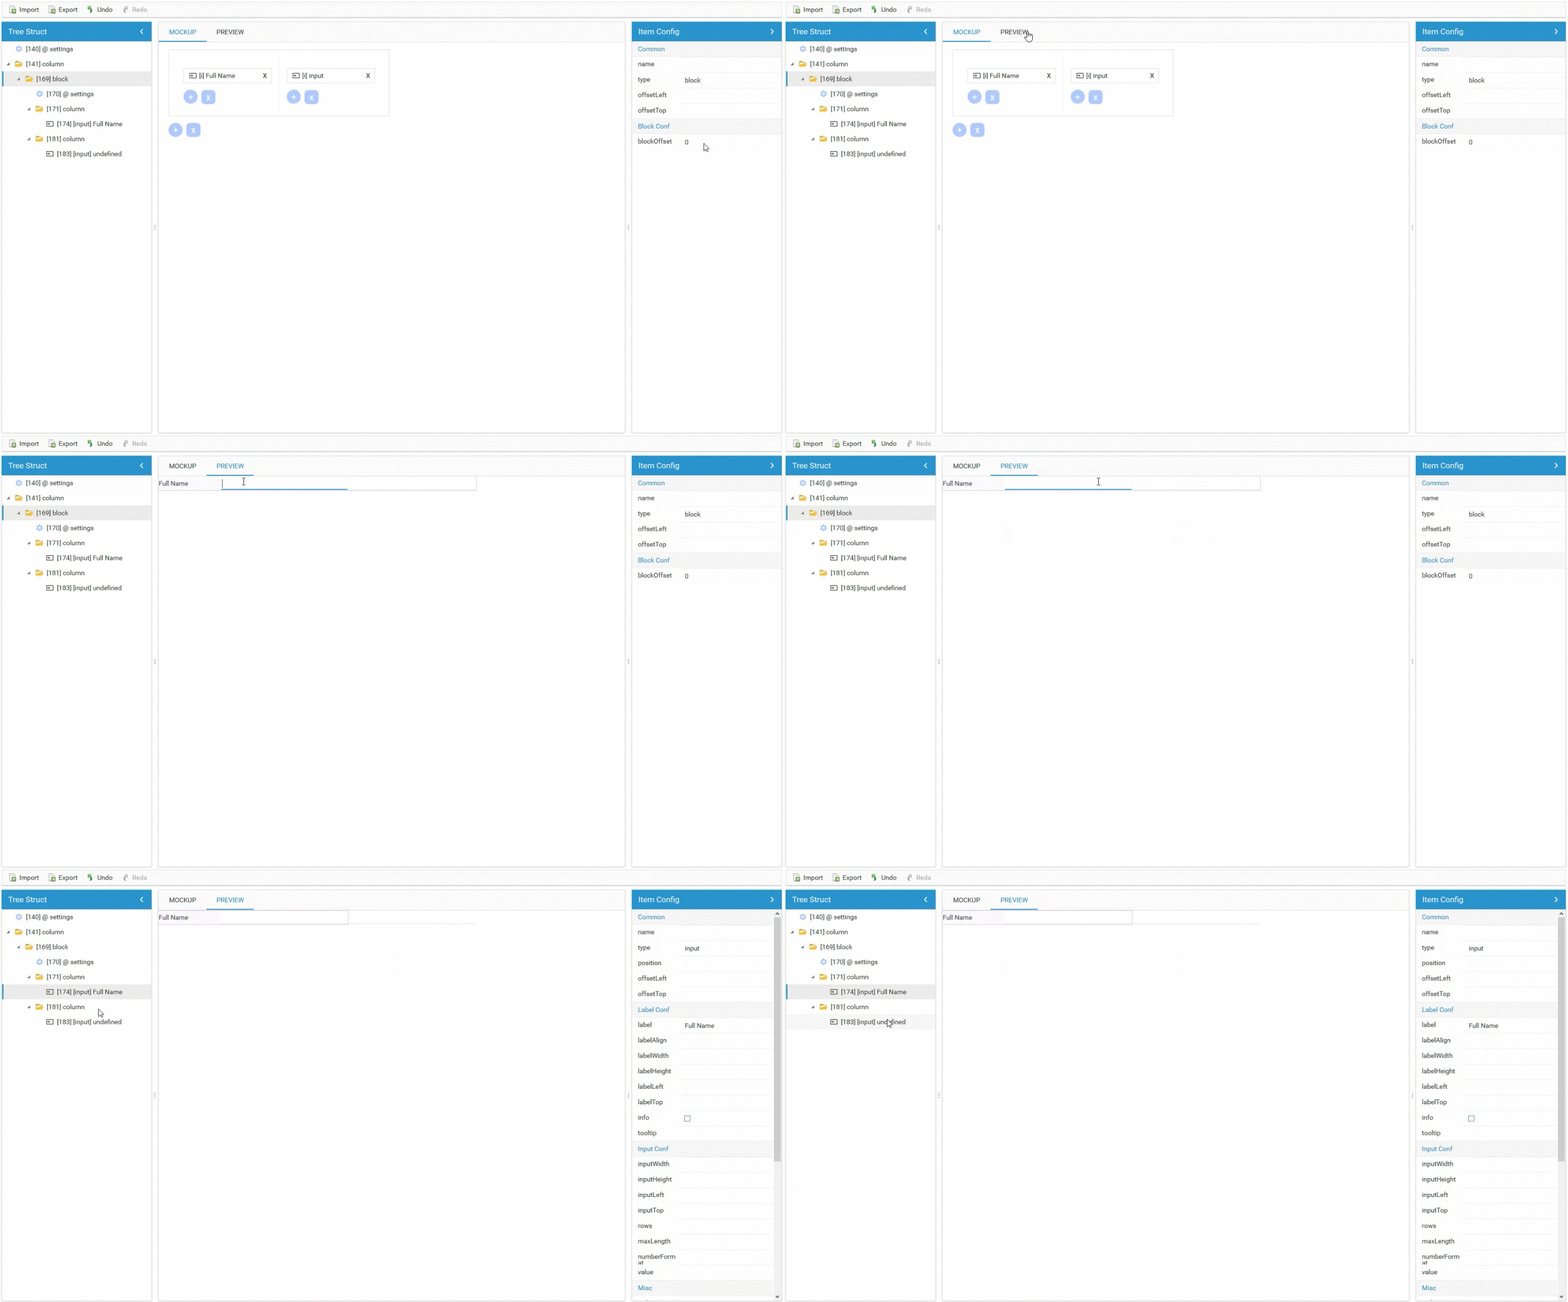
Phone number field. The phone number field is the same as a full name (just a slight difference in sizes), so the fastest way to create it is by copying the previous block.
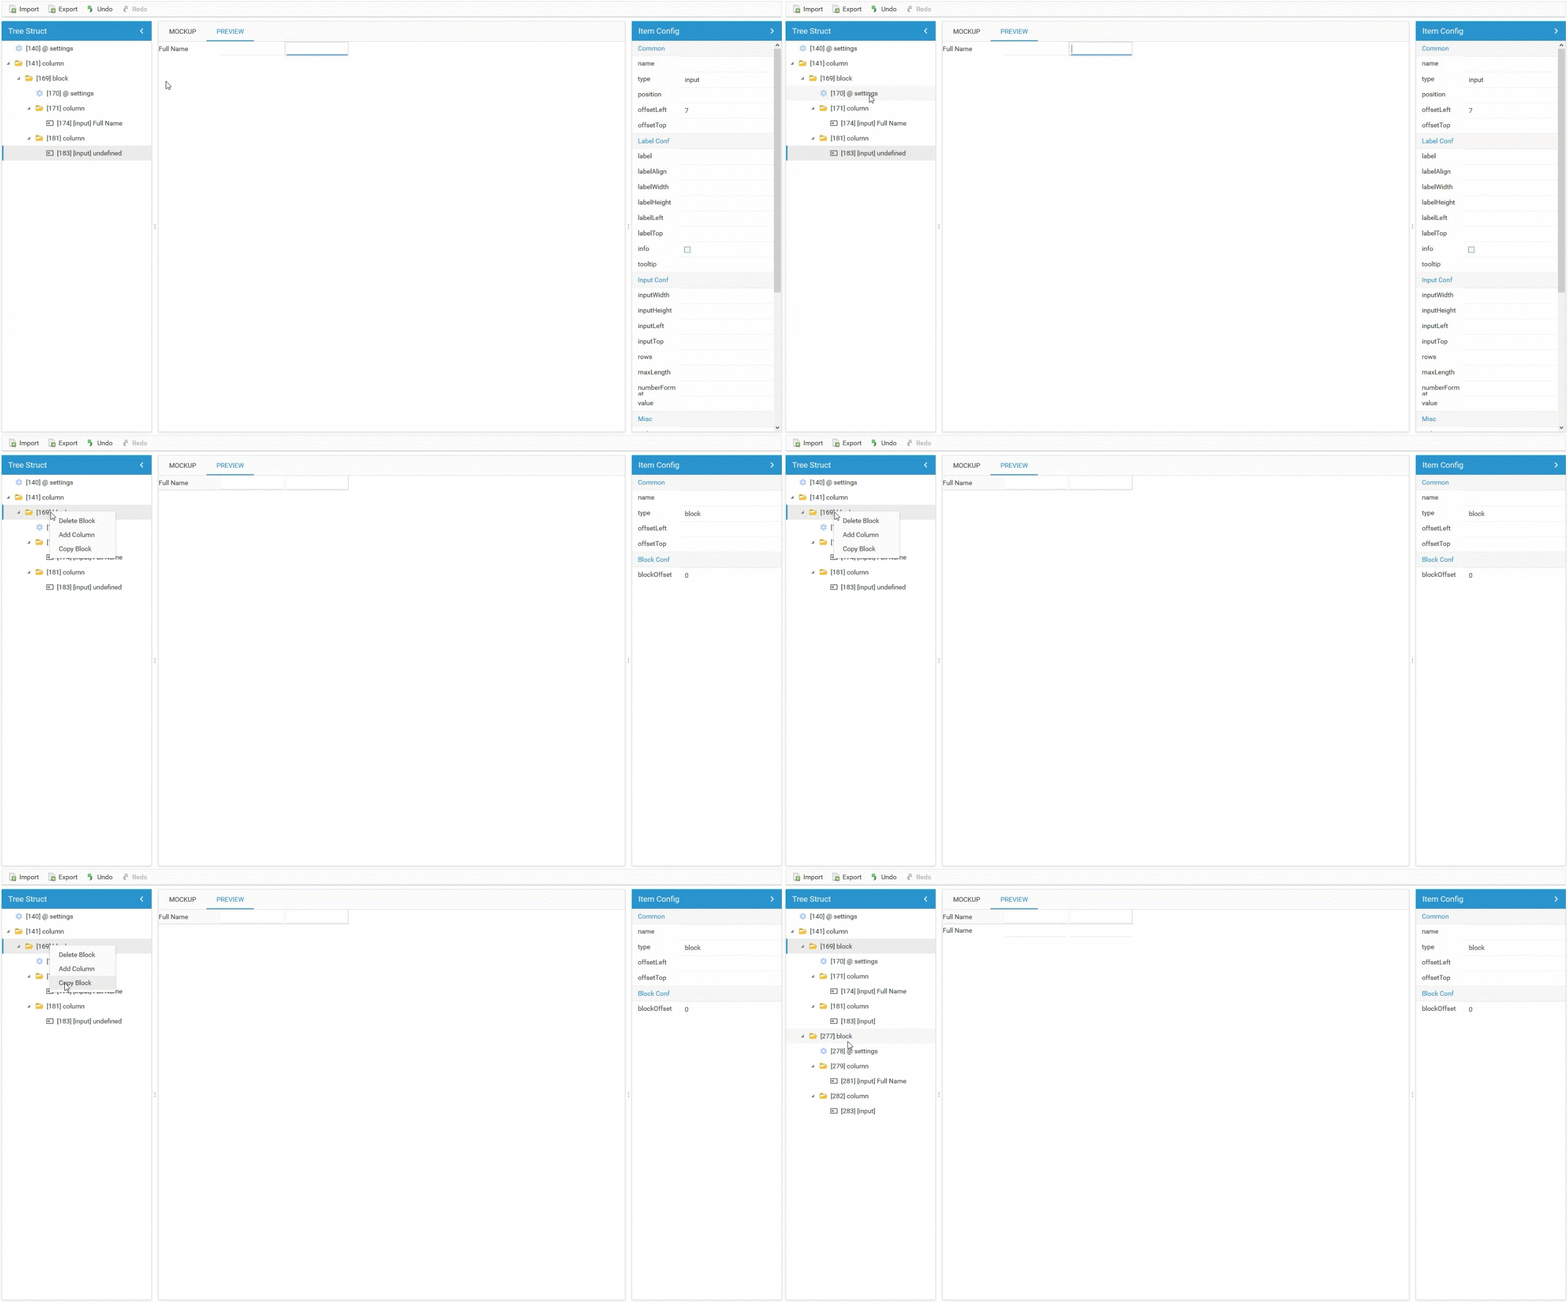
Besides, we need to remove inputWidth in settings, replace label from full name to phone number, and make the custom width for the inputs: the first input gets 60, the second one – 200.
Company field. Now let’s deal with the company field. It’ll be quite simple: add an input, give it a name, using drag-n-drop move it after the full name block. As you may notice, each block has its own built-in offsets in the skin, that’s why we need to level the phone number field (move up and down). For this, the phone number block gets offsetTop – 5.
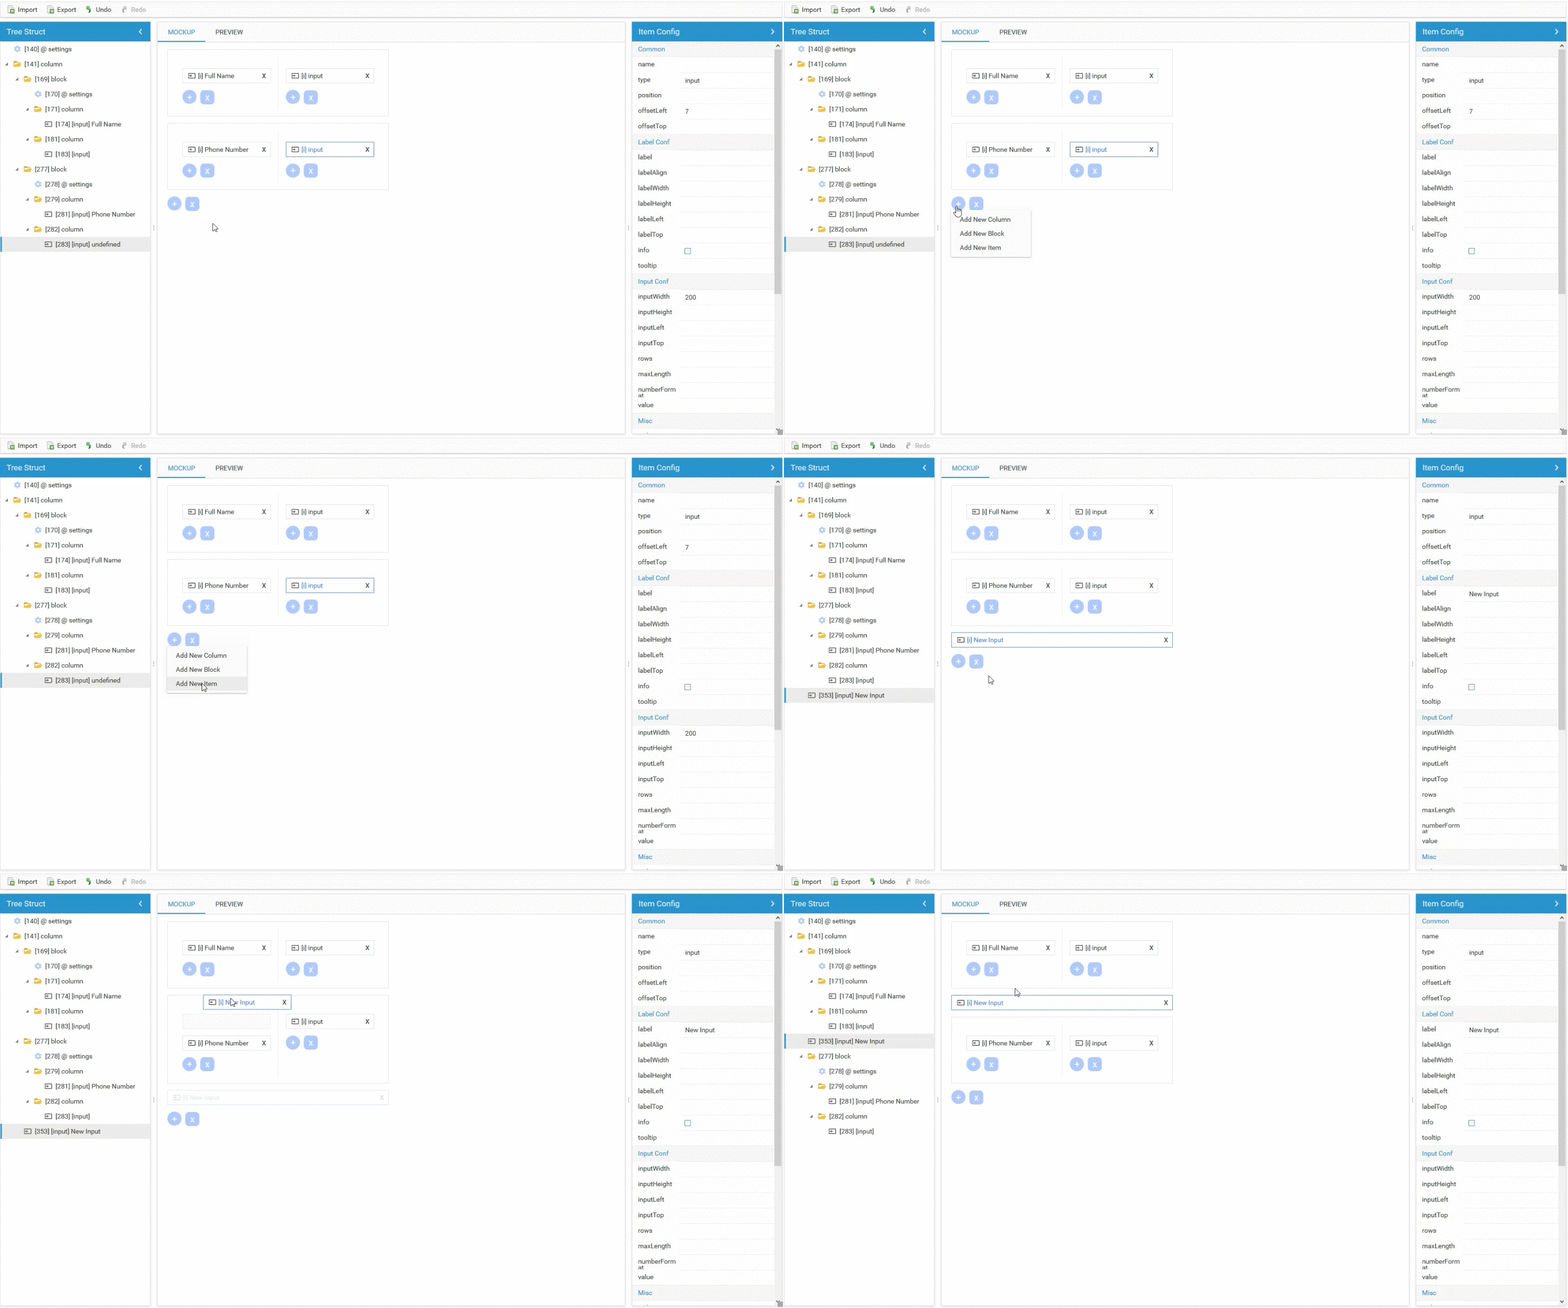
Email field. It’s super easy to create an email field: copy the company block, drag and drop it to the right place and change the label to “email”.
Country field. A country field is created by copying the email field, changing the type to select, and changing the label.
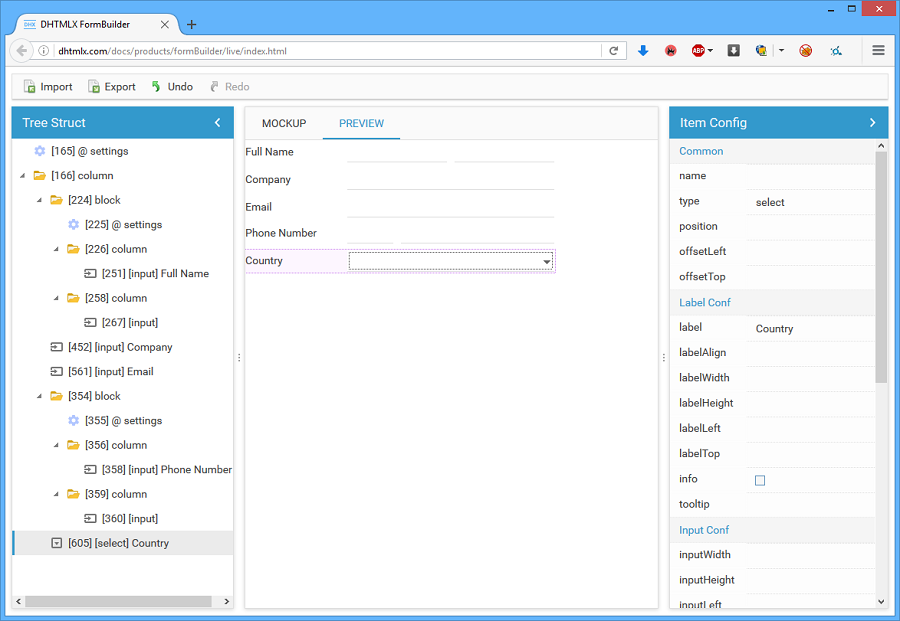
Remember that you can check the interim result by switching the view from Mockup to Preview. Looks nice, isn’t it? ;)
Radio buttons. As you may remember from our scratch, there are two fields with checkboxes and radio buttons follow. Well, it’s not just copying and changing the name like we did in the previous steps, but more complicated work. But don’t worry – you just need a little more practice, and you’ll create such kind of forms as easy as ABC.
How to start:
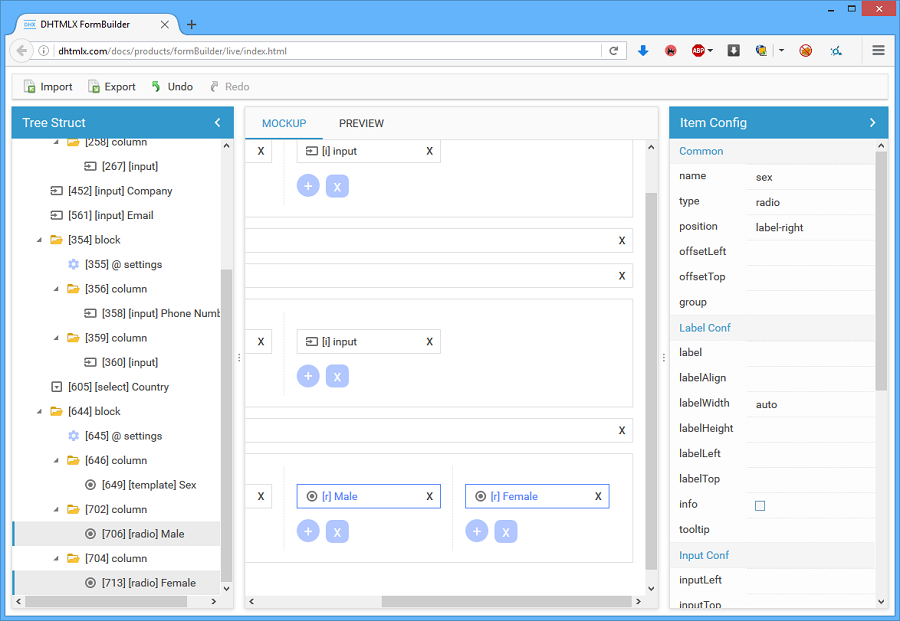
- Create a block. Add blockOffset:0 and offsetTop:5 to this block (the same as for the phone number block). This block will contain a template with a sex label.
- inputWidth = 0.
- Add 2 radio buttons to the next 2 columns
- Set a little offset for the right radio button
- Make position:label-right for both radio buttons
- Change labelWidth:auto and type to radio (press ctrl to choose two items from the tree at once).
To add radio functionality to the buttons, give them the similar name.
Language field. Copy the previous block (the one with the radio buttons). Change the type from radio to checkbox, remove name, add the 3rd checkbox by copying the female column.
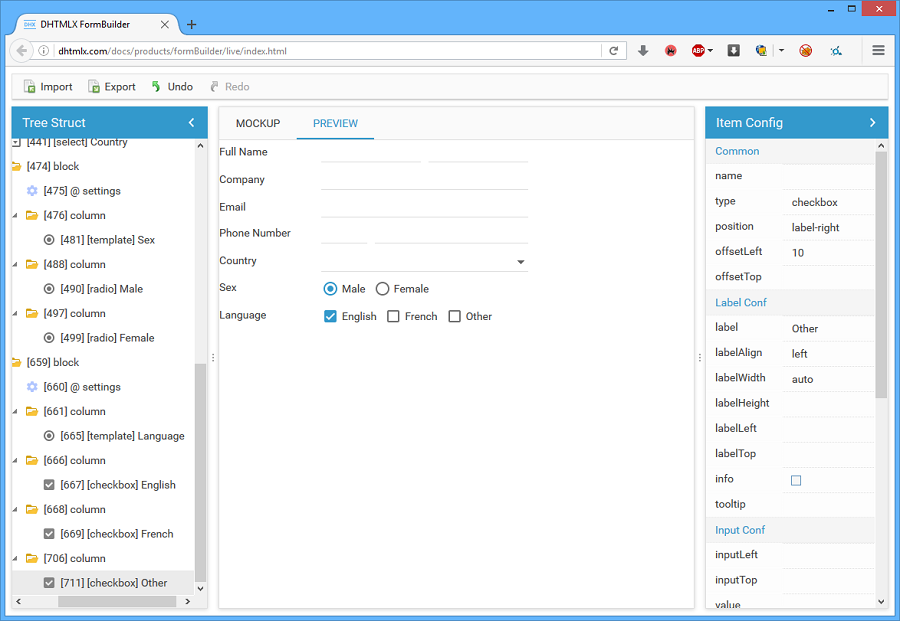
Almost ready! 3 more elements left.
Comments field. The familiar actions – copy the company block and rename the label.
One more checkbox. Copypaste the language block. Make a text of the template item equal to one space (we need it to take some space) and remove the next 2 columns.
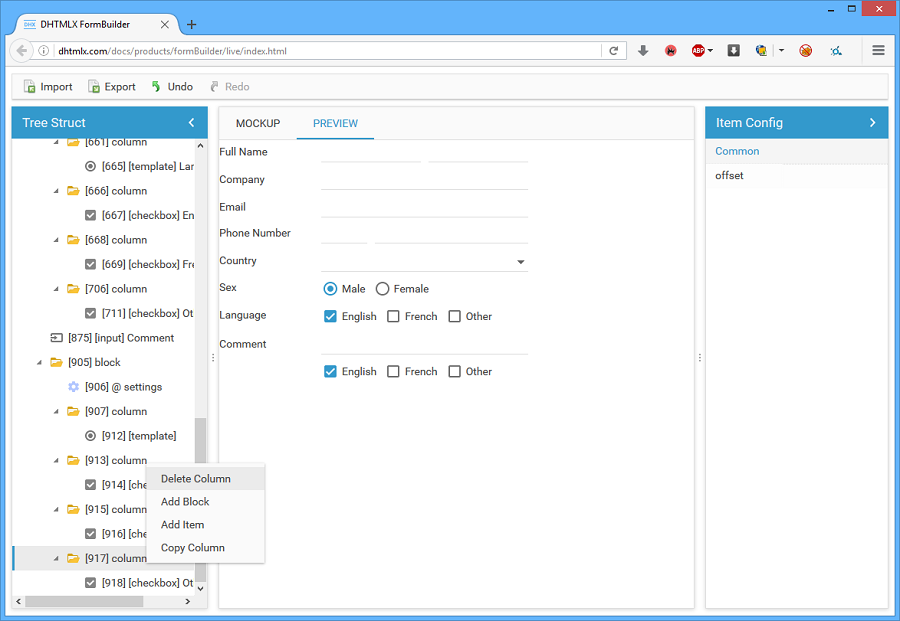
We are so close to finish.
Register button. Now we just add the button. In order to place it in the center of the form, we add offsetLeft:130 and offsetTop:30.
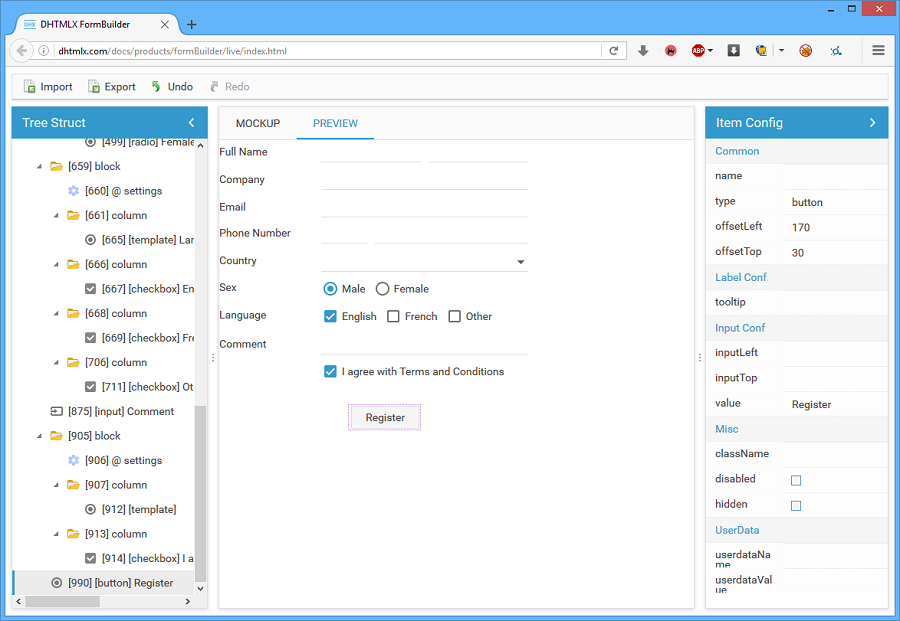
Check Preview tab and enjoy the created form! To add it to your application, click “Export” button and copy a ready code of your form.
Download the json we’ve exported. Now you can import it to the form builder and get the form from our picture.
We hope you enjoy the result as we do! :) Share your thoughts in comments and feel free to send your feature requests.