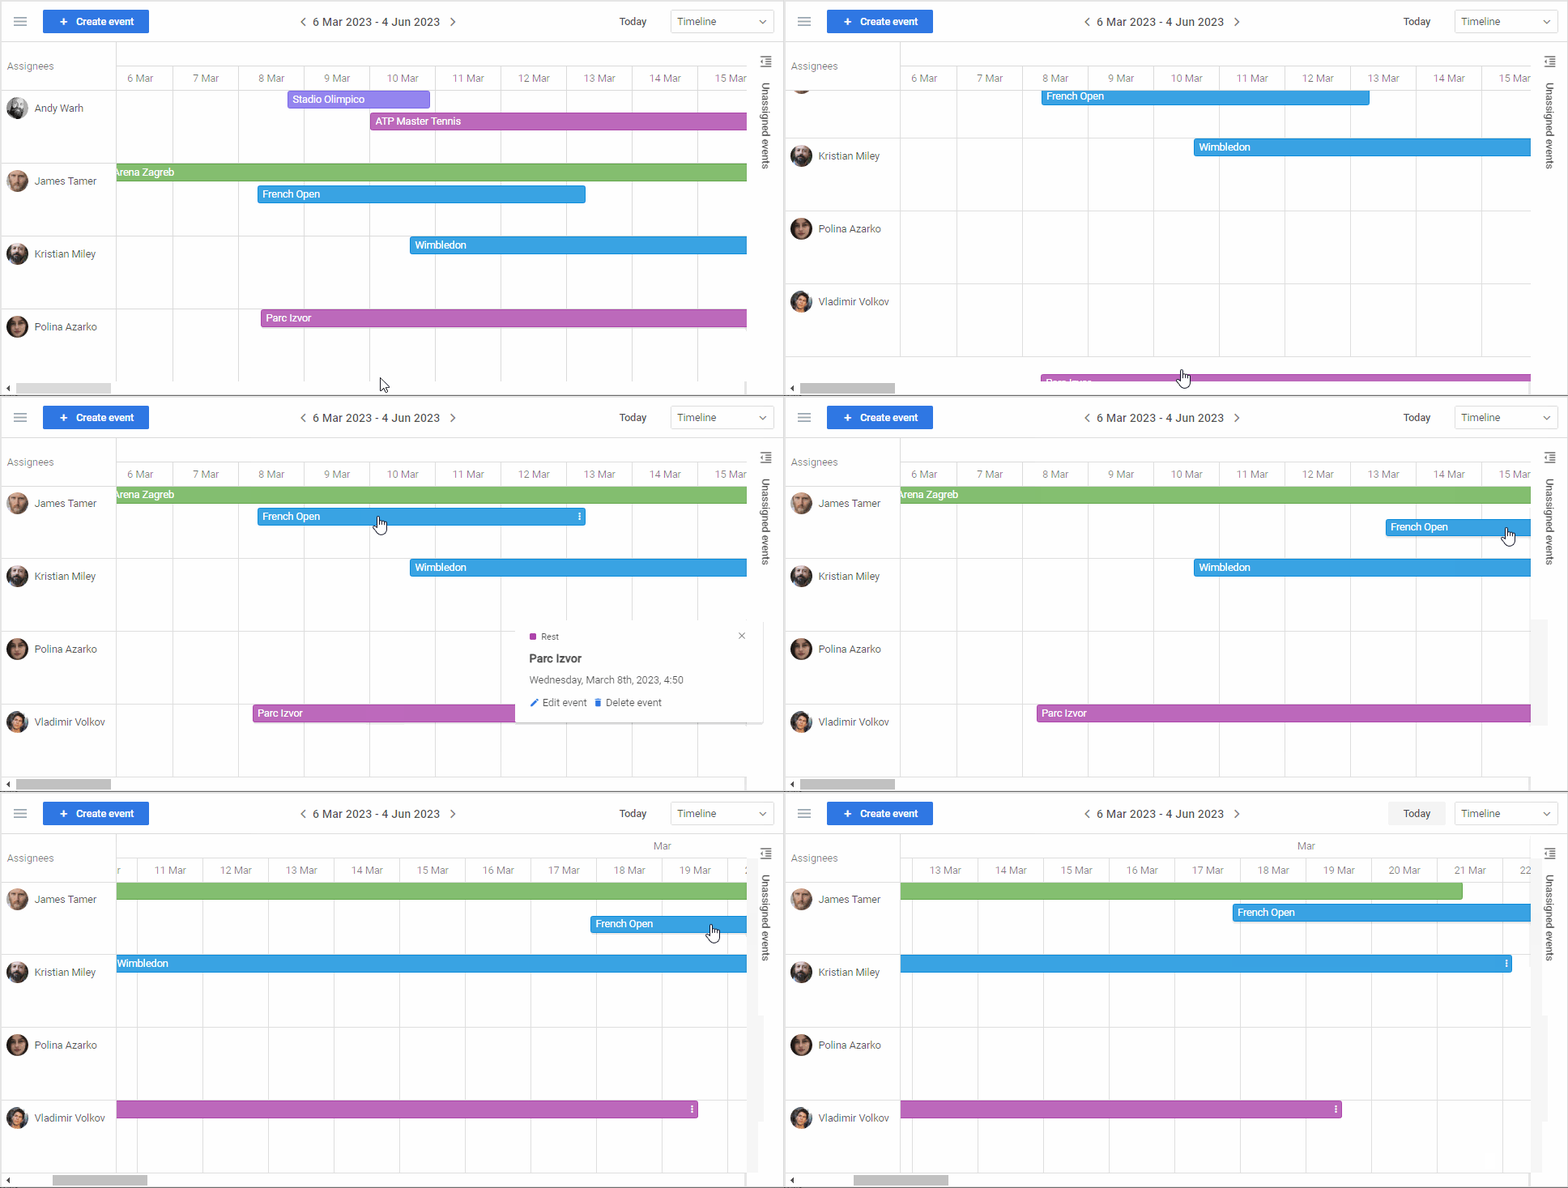
It is high time to start writing the DHTMLX release history of 2023. So we are excited to present DHTMLX Event Calendar 2.0! This major update of our JavaScript Event Calendar comprises a pack of top features and improvements for productive event management. The most notable novelties are a Timeline view mode with a column for unassigned events, support for recurring events, and an ability to set custom view modes. We also added new controls for switching between view modes in the toolbar, the ability to dim past events, a current time marker in Agenda and Timeline views, and auto scrolling for drag-and-drop actions. Besides, there are numerous enhancements to facilitate your experience with DHTMLX Event Calendar.
Download a free trial of DHTMLX Event Calendar v2.0 >
Now we proceed with the main aspects of this release in more detail.
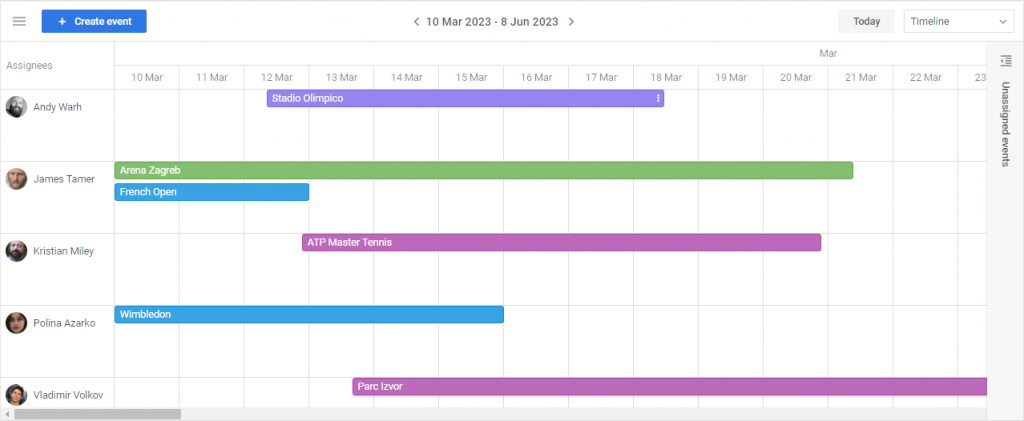
Timeline View Mode
Let us start with the new view mode, namely Timeline. It becomes the sixth option in the list of available built-in Event Calendar views, including Day, Week, Month, Year, and Agenda. But contrary to all existing view modes available by default, Timeline is optional.
Considering the great popularity of this view in the DHTMLX Scheduler component, it can become a big asset for your DHTMLX Event Calendar as well. The Timeline view provides a clear overview of planned appointments arranged from left to right along the timeline. But the main value of the Timeline view is the possibility to assign events to resources (employees, equipment, etc.).
The example below shows how your event calendar built with DHTMLX may look in all view modes. To select a specific one, you should use special controls in the toolbar.
By default, our Calendar displays events in the Week mode. But you can set Timeline or any other available view as the initial option by specifying the corresponding value in the mode config:
new eventCalendar.EventCalendar("#root", {
mode: "timeline"
// other configuration parameters
});
There are two ways to set the Timeline mode dynamically:
- setMode() method
Note that you can also define a custom view ID (value) for this method using the config.views property.
- setConfig() method
config: {
dragCreate: true,
eventInfoOnClick: true,
eventsOverlay: true,
autoSave: true,
dragResize: true,
dragMove: true
},
mode: "timeline"
});
Then you need to specify settings for your timeline in the array of the config.view property that provides Timeline with greater configuration opportunities compared to other view modes:
views: [
{
id: "timeline",
label: "Hour Timeline",
value: "Hour Timeline",
layout: "timeline",
config: {
unassignedCol: true,
step: [1, "hour"],
header: [
{ unit: "day", step: 1, format: "d MMM" },
{ unit: "hour", step: 1, format: "H" },
],
sections: [
{
label: "Andy Warh",
id: "1",
img:"/img/01/avatar_01.jpg",
},
{
label: "James Tamer",
id: "2",
img:"/img/02/avatar_02.jpg",
},
// other sections config
],
},
},
]
}
You also have an opportunity to specify a custom template for defining the appearance of timeline sections using the newly added timelineSection parameter in the templates object. This parameter takes an object of the section parameters.
timelineSection: (section) => {
return `
<div className="template-wrapper">
<img src=${section.img} alt=${section.label} className="section-img" />
<div className="section-label">${section.label}</div>
</div>`;
}
},
// other configuration parameters
});
With the Timeline view mode in action, end-users get a bird’s-eye view of their working schedules, become able to analyze the workload, and make necessary adjustments.
Recurring Events
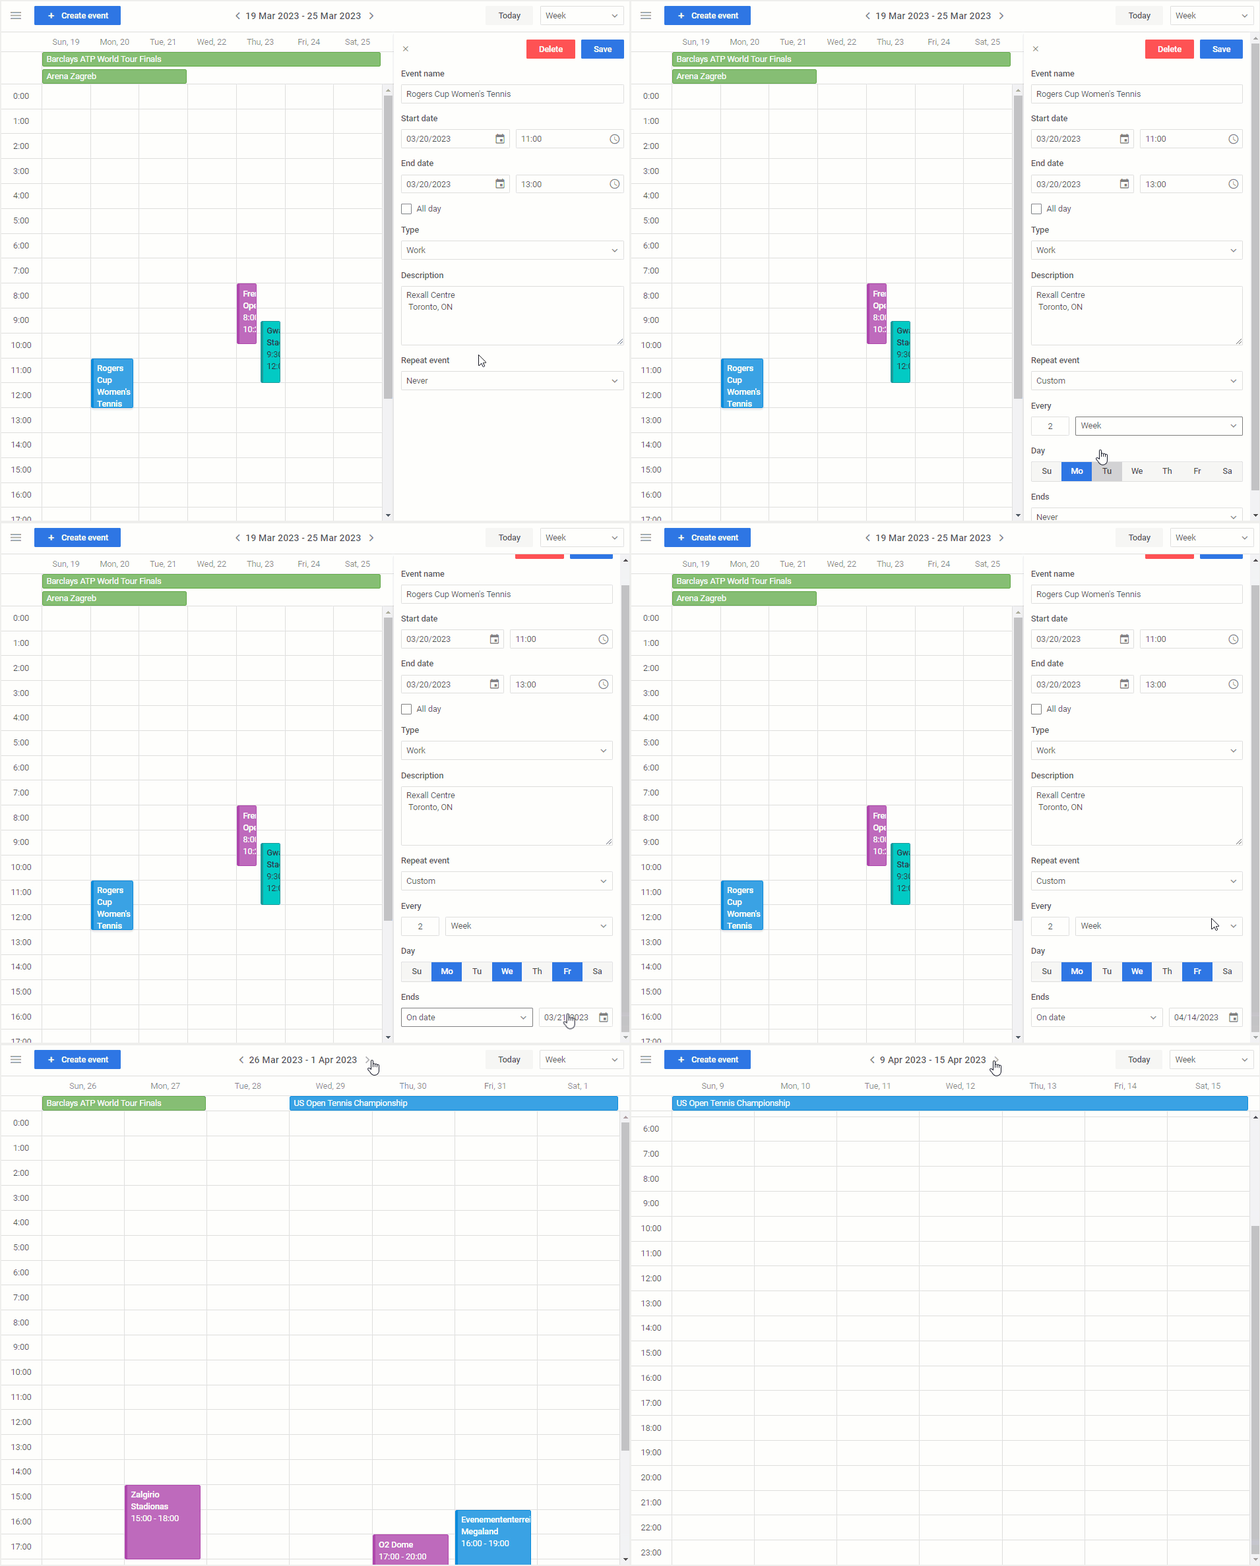
When managing your schedule via an event calendar, you will certainly deal with regularly repeated activities. And it may be tiresome and time-consuming to set up such tasks individually every time in your calendar. Fortunately, it is no longer the issue with DHTMLX Event Calendar. Starting from v2.0, you can specify the recurrence of appointments for all view modes using predefined or custom frequency rates.
When it comes to implementing event recurrence via API, you should use the recurring editor field type in the editorShape property.
events,
editorShape: [
{
type: "recurring",
label: "Recurring"
},
// settings of other custom fields
]
});
In the events property, we added several optional parameters for specifying event recurrence rules in the calendar:
- RRULE – defines a rule for recurring events
- recurring – enables/disables the recurrence of events
- STDATE – sets a start date for recurring events
- DTEND – sets an end date for recurring events
These new parameters are bound to the recurring editor field type. In practice, all you have to do is set the necessary recurrence rule in the RRULE parameter – and the other three parameters will be calculated automatically.
For instance, you may need to display a particular event on Monday, Wednesday, and Friday every two weeks:
{
...,
RRULE: "FREQ=WEEKLY;INTERVAL=2;BYDAY=Mo,We,Fr"
}, {...}
];
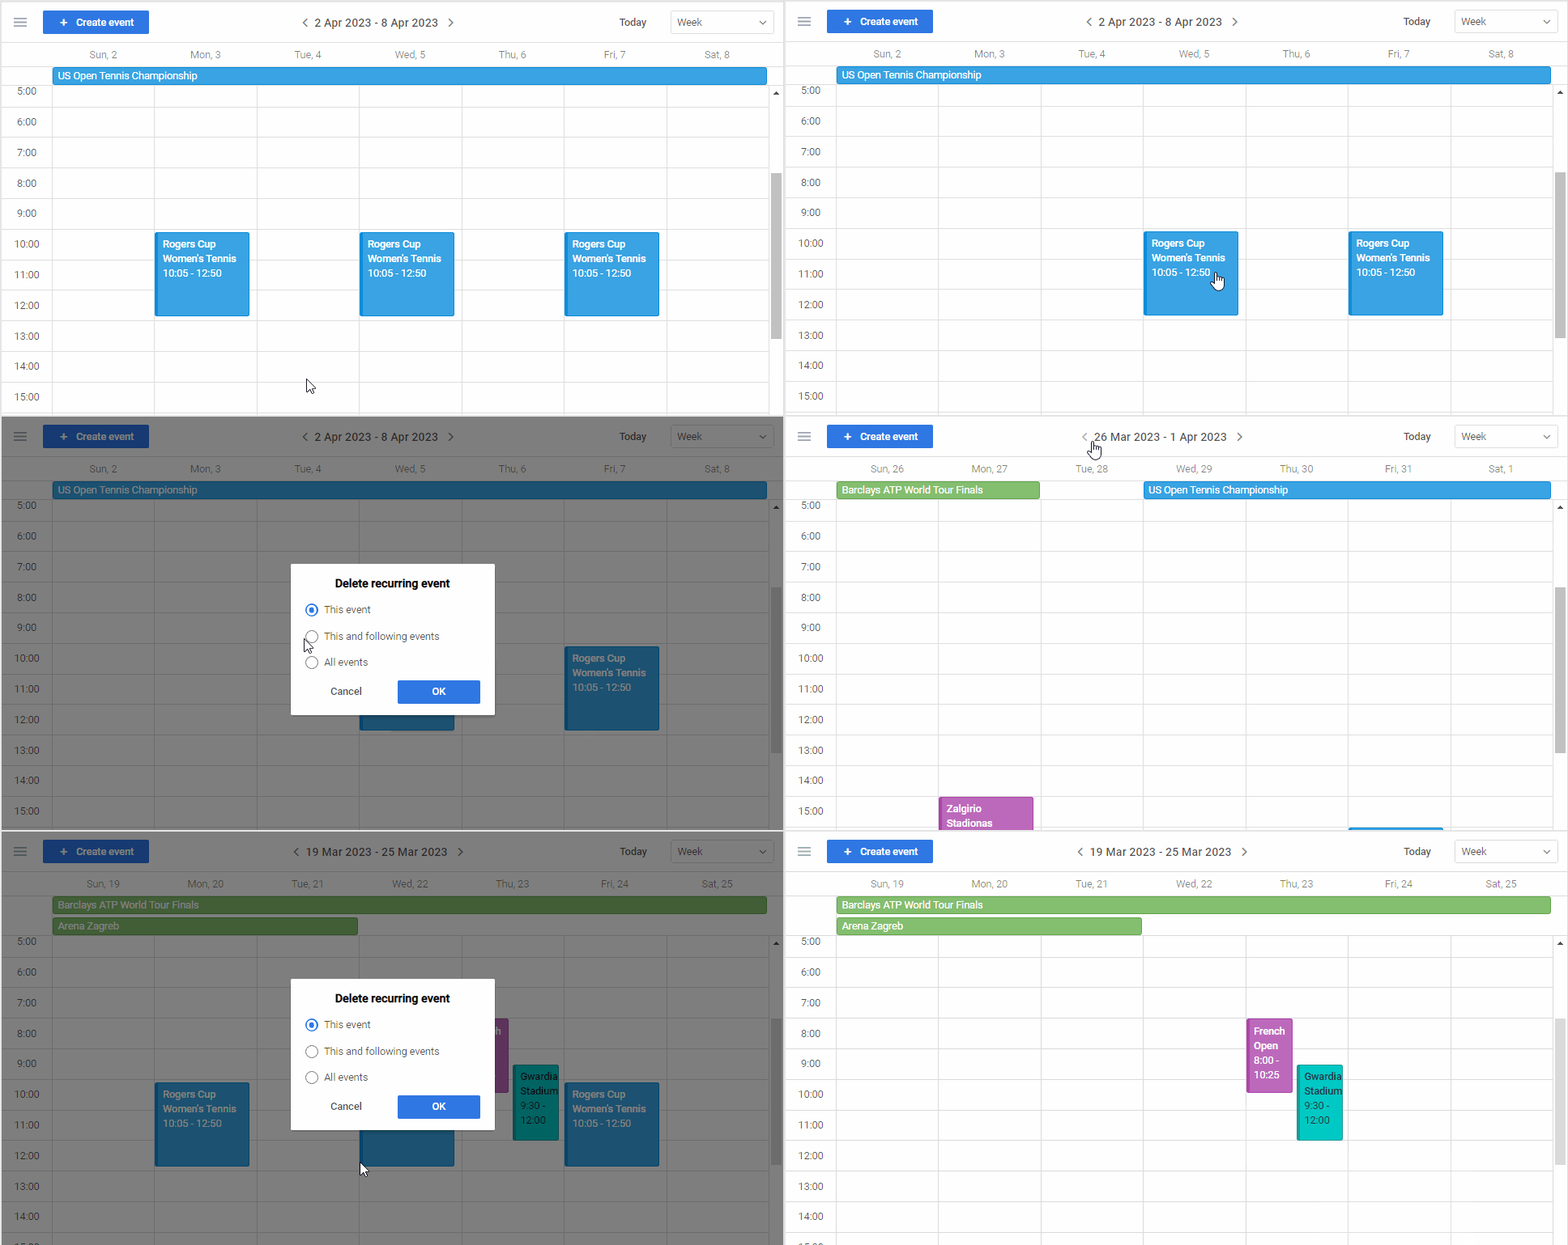
When editing or deleting any of the recurring events, your changes can be applied to:
- only a single event,
- the event being edited/deleted and all the following ones,
- all recurring events.
Unassigned Events in Timeline View
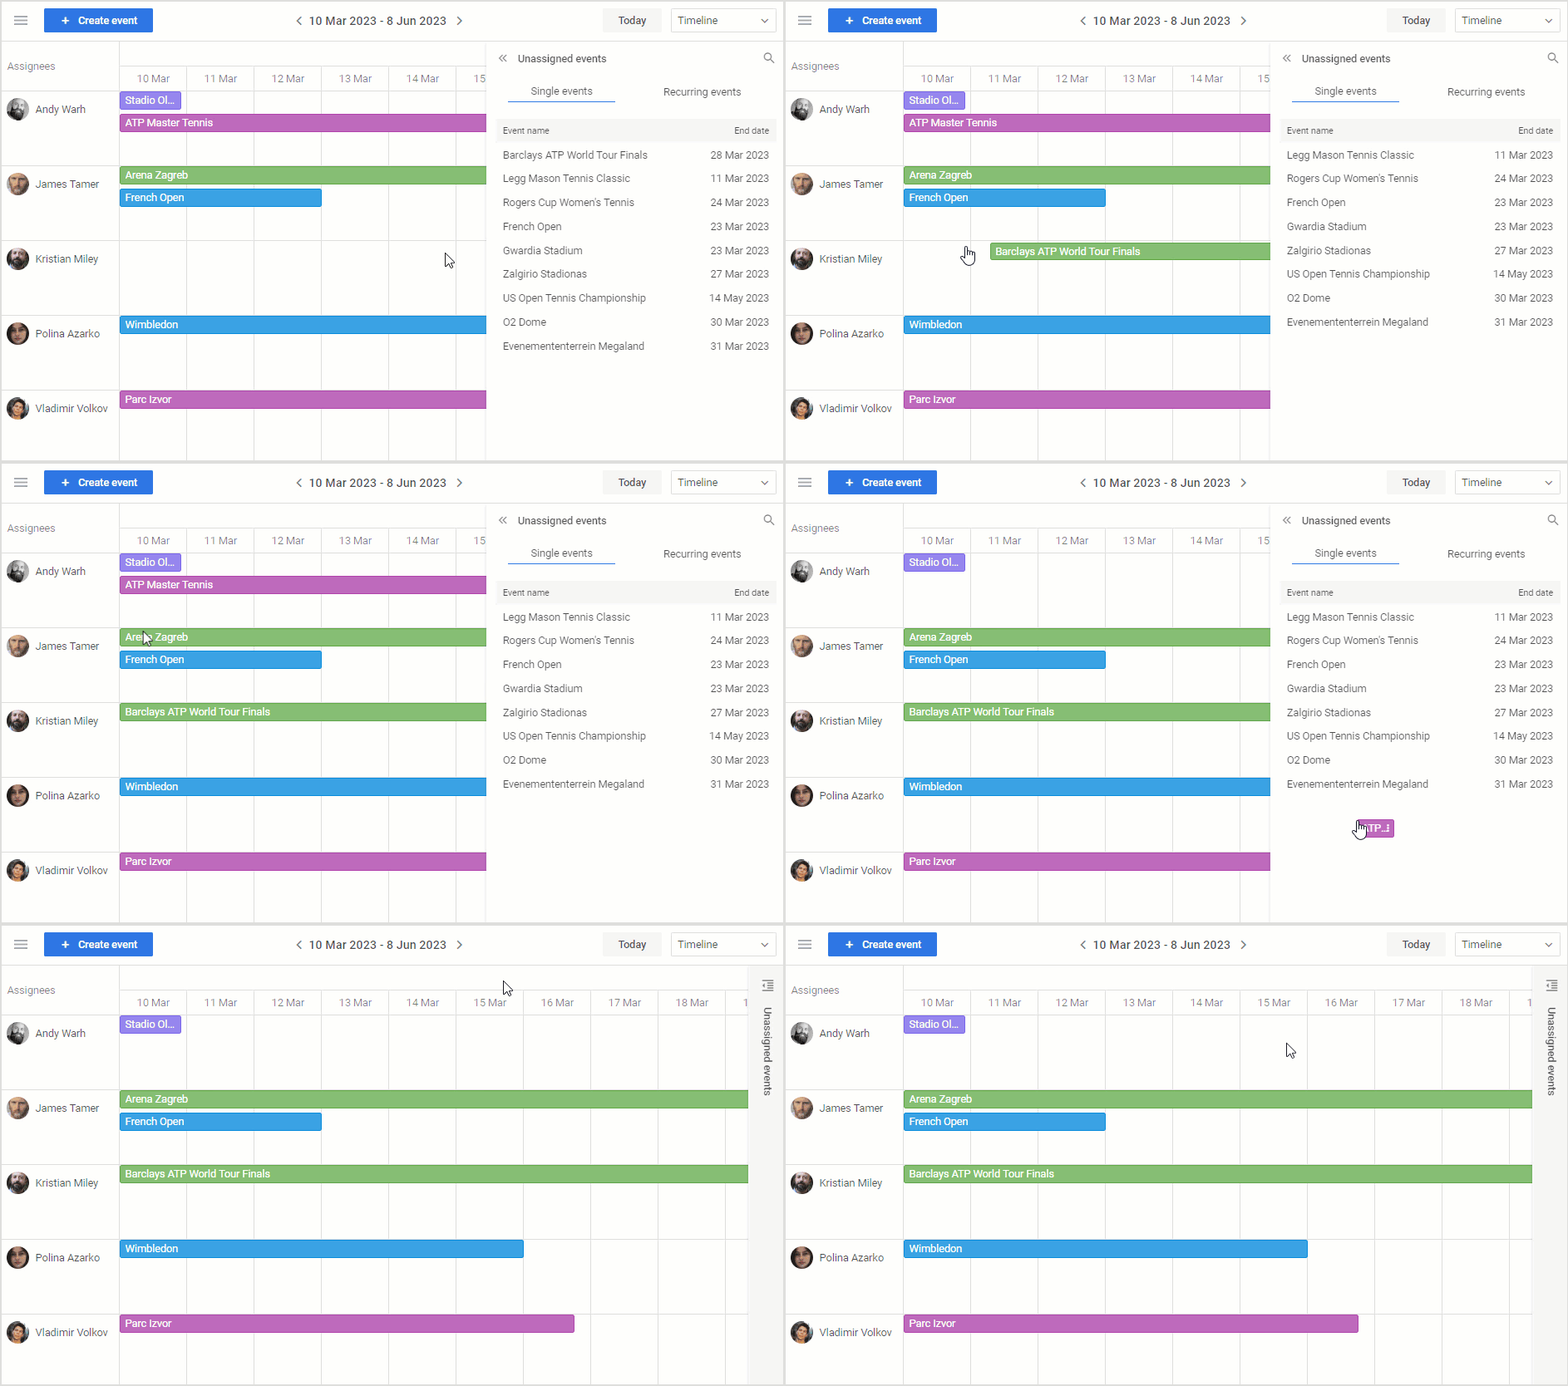
It is not that easy to make an optimal event calendar for a single person, let alone a schedule for a group of people using the Timeline view mode. That is why we also decided to add the possibility to keep tasks unassigned as long as needed in an extra column. Thus, when end-users have doubts about the most suitable assignee or date for a given task, they can just leave it unassigned and get back to it later.
 Check the sample >
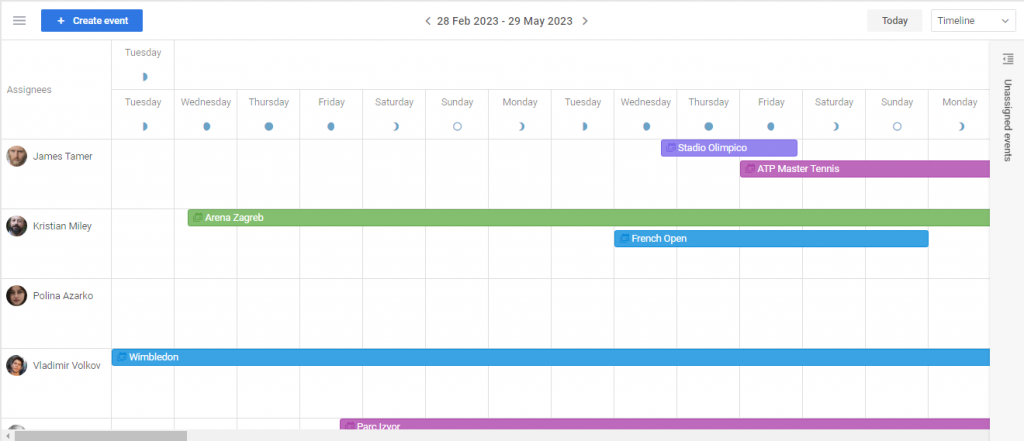
To add a separate column for unassigned events to your JavaScript event calendar, it is required to set the value of the unassignedCol? parameter to true in the Timeline view mode settings.
viewControlButton: "none",
views: [
{
id: "timeline",
label: "Timeline",
layout: "timeline",
config: {
unassignedCol: true,
// Timeline sections config
As a result, end-users can store unassigned events in the column on the right side of the timeline, assign them to a specific person, and, if plans have changed, move them back from the calendar to the unassigned column.
Custom View Modes in Toolbar
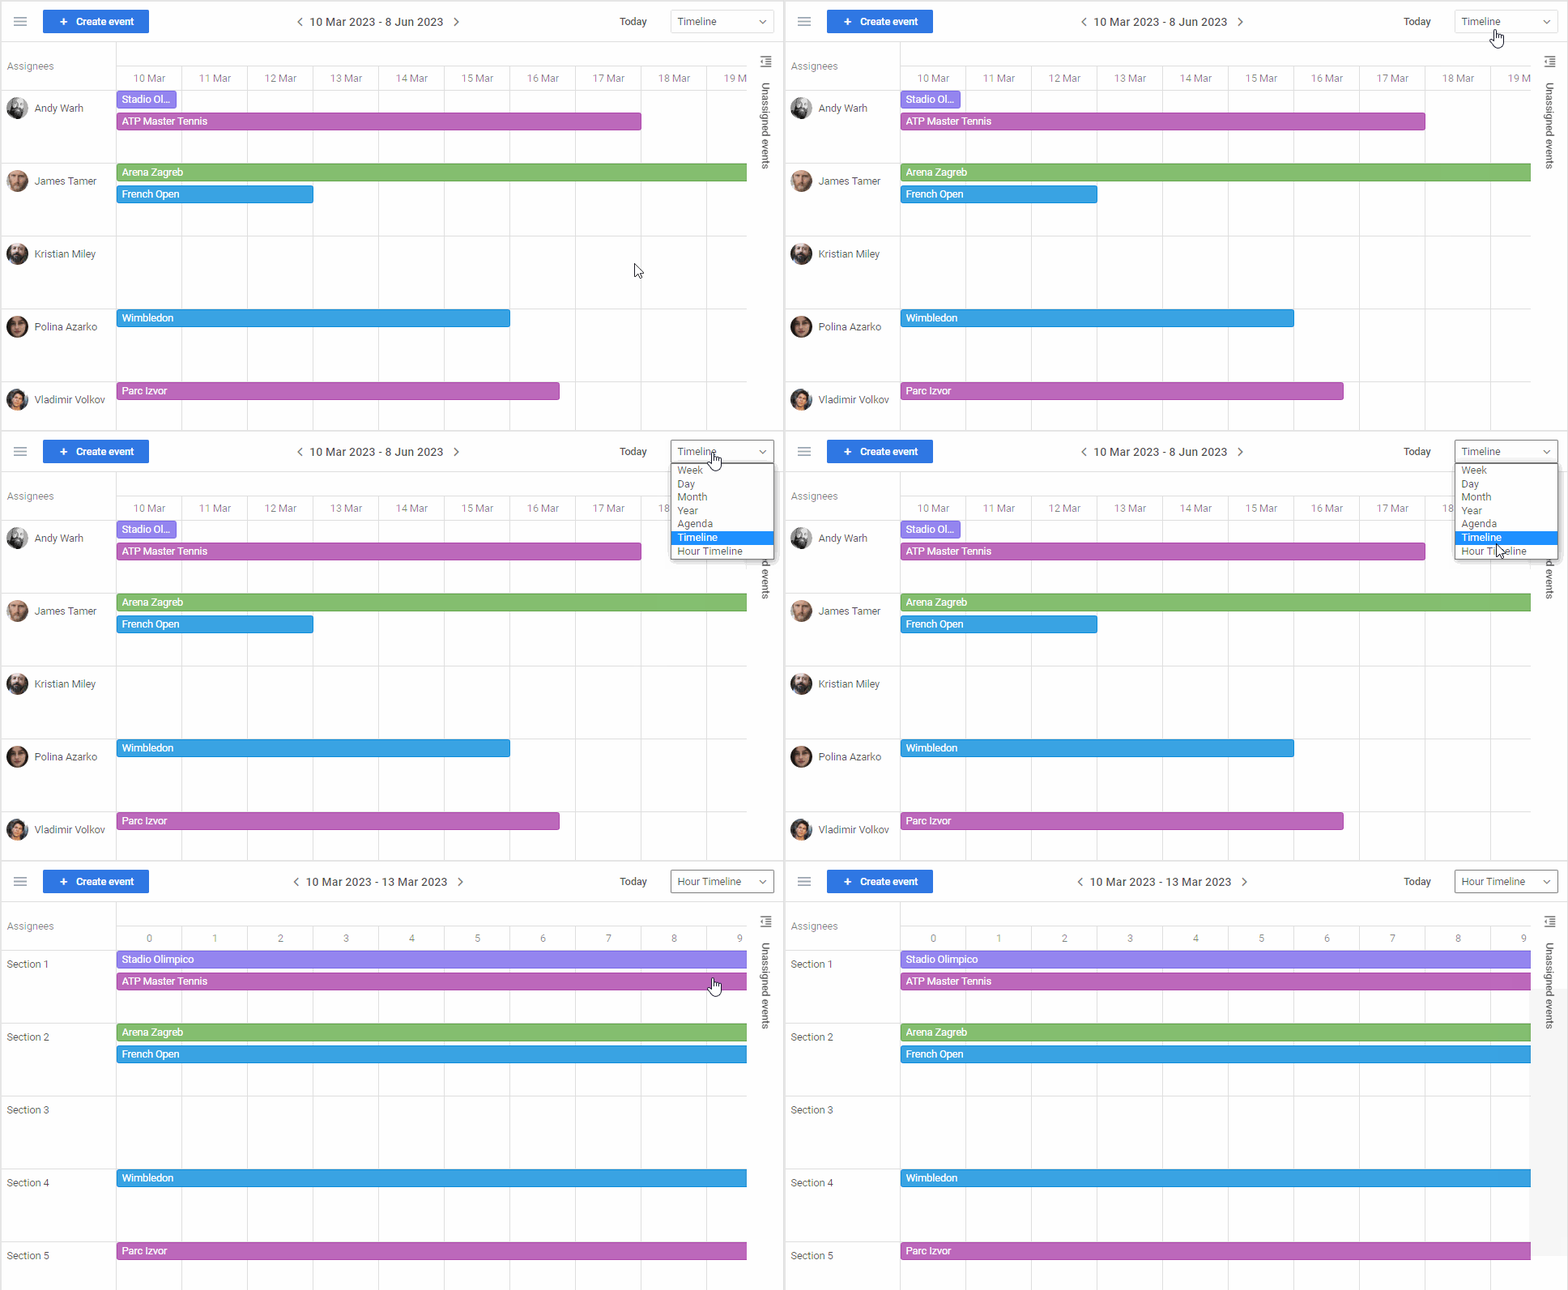
During the preparation of this release, we also focused on giving you the freedom to define your own view modes in DHTMLX Event Calendar. Previously, events could be displayed only with built-in views (Day, Week, Month, Year, Agenda) using the corresponding controls in the toolbar. From now on, it is possible to create a custom set of view modes, including the new Timeline view, and specify your own settings for them.
Custom views in the toolbar are specified using the config.views property. For instance, the toolbar of your event calendar can contain a couple of Timeline views with different sets of sections and timescale settings.
// other views config
{
id: "timeline",
label: "Timeline",
layout: "timeline",
config: {
unassignedCol: true,
sections: [
...
],
},
},
{
id: "timeline2",
label: "Hour Timeline",
layout: "timeline",
config: {
unassignedCol: true,
step: [1, "hour"],
header: [
{ unit: "day", step: 1, format: "d MMM" },
{ unit: "hour", step: 1, format: "H" },
],
},
},
];
 Check the sample >
More information on the customization of view modes can be found in the documentation.
New Controls for Changing Modes
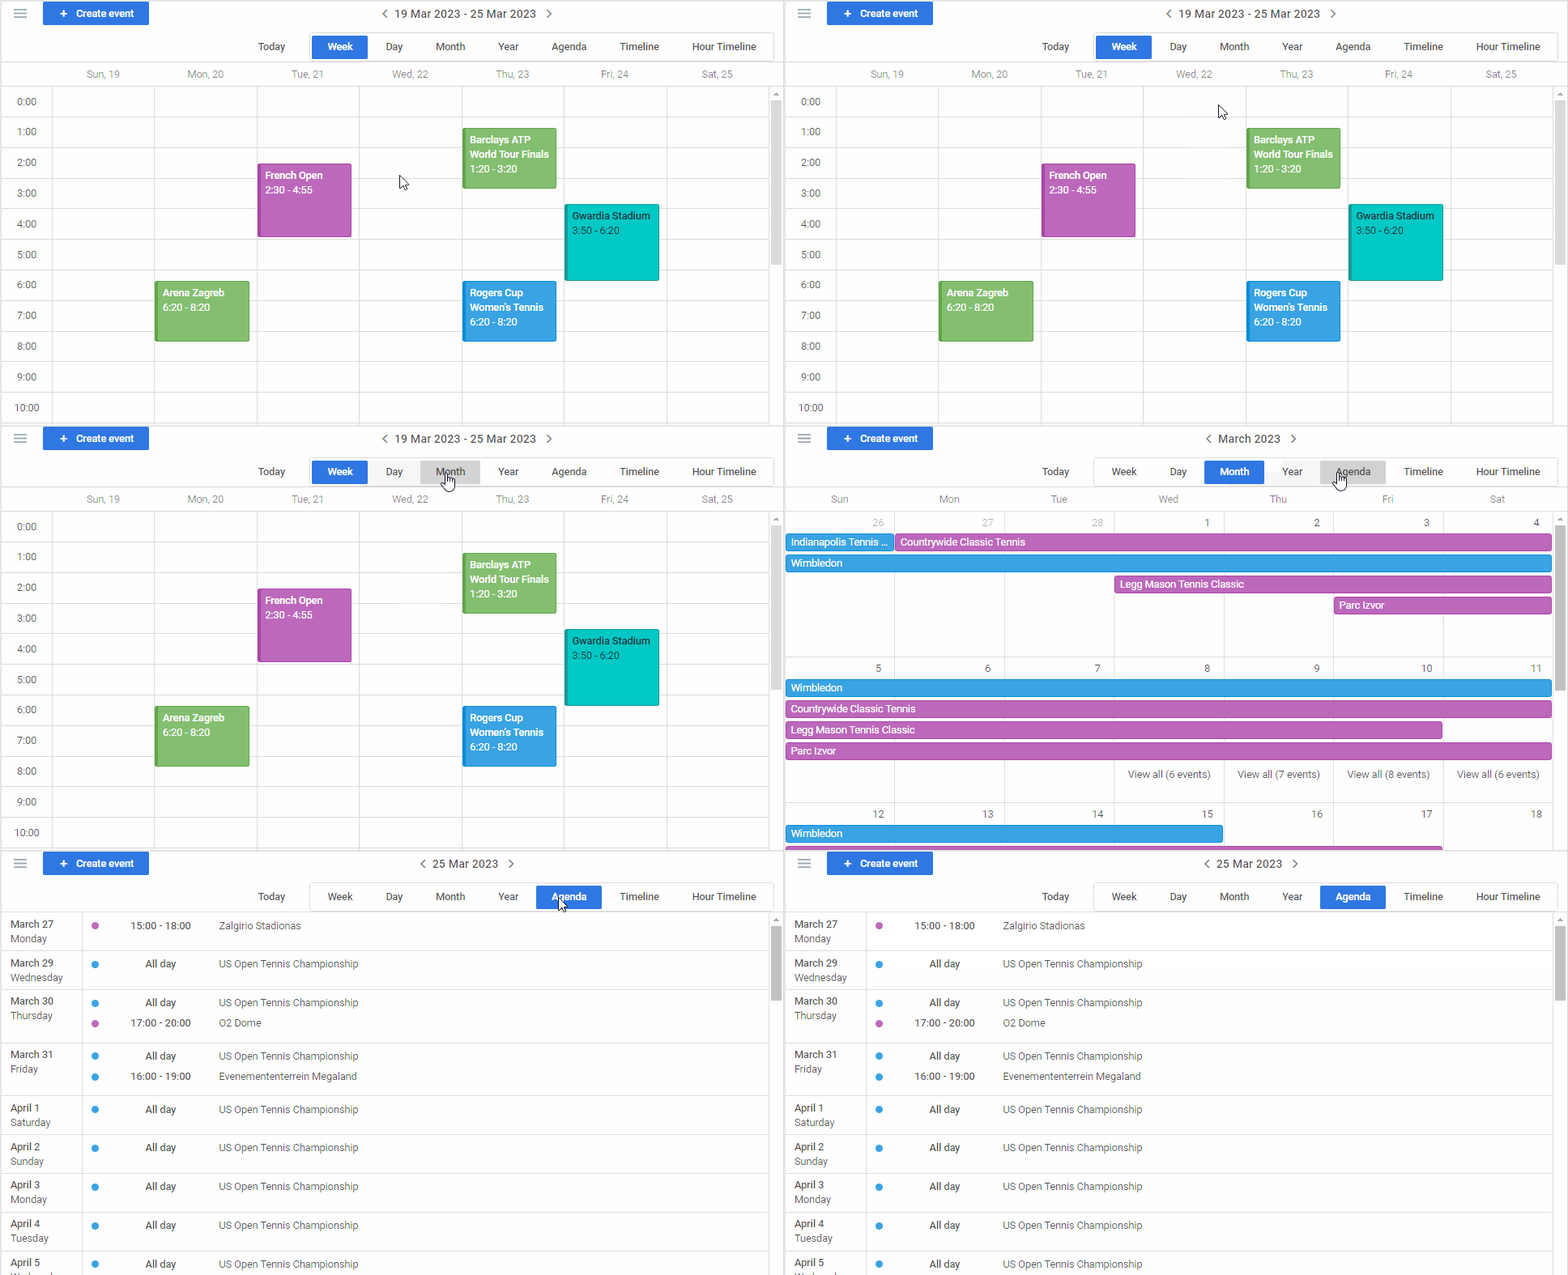
Another contribution to the convenient and diverse user experience in v2.0 is the availability of two new controls for switching between view modes – toggle and selector (drop-down list). By default, our Event Calendar automatically activates one of the following options depending on the number of views added to the toolbar:
- toggle buttons with 3 views,
- dropdown list with more than 3 views.
To define a particular control for switching calendar views manually, you should set it as a value in the viewControl parameter of the Calendar config object:
viewControl: "toggle",// "auto" | "dropdown" | "none"
views: views
};
Here is how view modes can be changed with toggle buttons:
 Check the sample >
If end-users don’t need to change view modes, you can hide the switcher via API.
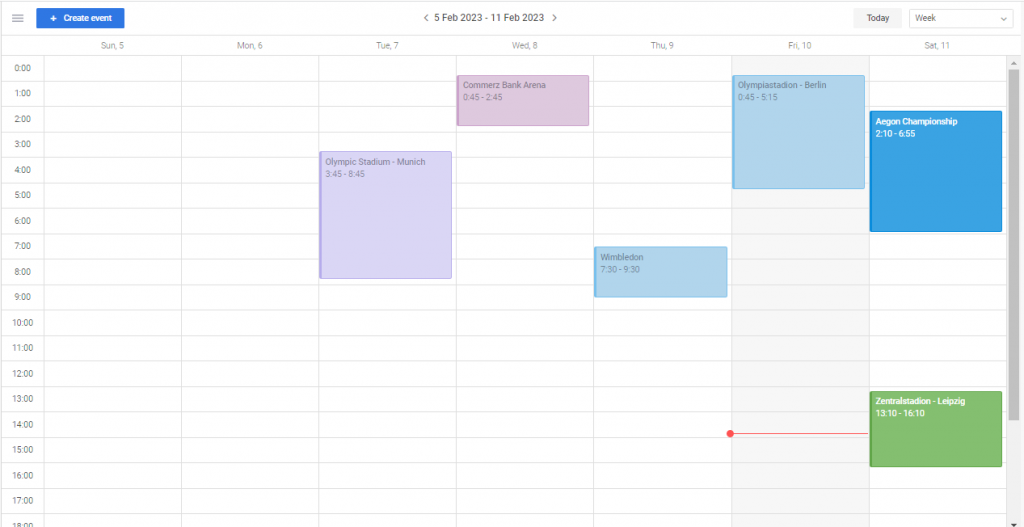
Dimming Past Events and Showing Current Time Marker
Similar to Google Calendar, the new version of our event calendar library allows dimming the brightness of past events. It is aimed at simplifying the calendar navigation and ensuring better focus on current and upcoming events. To activate this way of displaying past events, you have to change the value of the dimPastEvents parameter from false (set by default) to true in the config property of Event Calendar.
config: {
// other configuration parameters
dimPastEvents: true,
{
});
Moreover, now you can add a special marker that will highlight the present day and time in your calendar.
Autoscrolling for Drag-and-Drop Actions
DHTMLX Event Calendar v2.0 has become more user-friendly in terms of rescheduling events. In this major update, we introduced auto-scrolling support to facilitate drag-and-drop operations with scheduled appointments.
This feature will make it much easier for end-users to drag and drop calendar items to the time slots that are out of the screen visibility zone.
We invite you to review all features delivered in the new DHTMLX Event Calendar in the “What’s new” section of the documentation.
All necessary information on the migration to v2.0 is provided in the “Migration to newer versions” section.
Don’t miss an opportunity to practically estimate the latest Event Calendar version via a free 30-day trial version. For our current clients, v2.0 is available in their Client’s Area.
