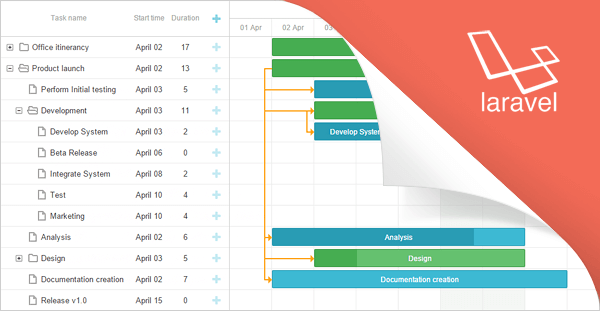
Our developers always try to provide you with the possibility to use our components in different ways. In this article, we’ll talk about dhtmlxGantt. We’ll learn how to use this component with the Laravel framework. Laravel is a free, open-source PHP web application framework. Laravel was created for the development of web applications following the model–view–controller (MVC) architectural pattern.
Download dhtmlxGantt and start using it with Laravel
It will be a step-by-step guide intended both for developers who have already been familiar with Laravel and those of you who only starts working with it.
Installing Laravel
We’ll use Composer to install Laravel. It’s a dependency manager for PHP that allows you add required packages to your projects in a fast and easy way. Usually, you can find it in your Linux repository. In another case, you can download installation files from its home page.
To learn how you can install Laravel, you can follow this installation guide. Here’s one of the available opportunities. First of all, we need to create a folder for our project and download the Laravel packages. Run in your terminal:
This code will create the dhtmlxGantt folder and load the Laravel files along with its dependencies into it.
Now we need to add dhtmlxConnector to our project. It’s a helper server-side library that enables access to external data sources and backend systems. To do so, enter the working directory and add the required package using Composer:
composer require dhtmlx/connector-php
One more thing before getting started. Download the dhtmlxGantt package and unpack its content within the public/dhtmlxGantt directory.
That’s it. Preparations are finished, and we can continue creating the Gantt chart.
Create a Data Source
As an example, let’s use a previously created database. Here’s the direct link to a zip archive that contains the project that you can use as an example of how different DHTMLX components can work with Laravel. Inside you can find an SQL dump file named dhtmlx_samples.sql. Let’s use it to create a local database copy. In case of MySQL you should run the client:
Now you can create a new database and import the data from the dump file:
USE gantt;
\. /path/to/file/dhtmlx_samples.sql
Done. The database is created. Our next step is to create a the Gantt chart itself.
Create the Gantt Chart
As it was said before, Laravel follows the MVC architectural pattern. Since MVC means Model-View-Controller, the process of creation will consist of three main stages.
Create a Model
To access the data we need to specify the appropriate model class. You should create two files within the app directory of your project.
The first one is GanttTask.php:
namespace App;
use Illuminate\Database\Eloquent\Model;
class GanttTask extends Model
{
protected $table = "gantt_tasks";
public $primaryKey = "id";
public $timestamps = false;
}
And here’s the second one, GanttLink.php:
namespace App;
use Illuminate\Database\Eloquent\Model;
class GanttLink extends Model
{
protected $table = "gantt_links";
public $primaryKey = "id";
public $timestamps = false;
}
Create the View Object
Create a new file with name gantt.php within the resources/views directory of your project. Then and add the following code:
<head>
<meta http-equiv="Content-type" content="text/html; charset=utf-8">
<script src="dhtmlxGantt/codebase/dhtmlxgantt.js"></script>
<link rel="stylesheet" href="dhtmlxGantt/codebase/dhtmlxgantt.css">
</head>
<body>
<div id="gantt_here" style='width:100%; height:250px;'></div>
<script type="text/javascript">
/* chart configuration and initialization */
gantt.config.xml_date = "%Y-%m-%d %H:%i:%s";
gantt.config.step = 1;
gantt.config.scale_unit= "day";
gantt.init("gantt_here", new Date(2010,7,1), new Date(2010,8,1));
/* refers to the 'data' action that we will create in the next substep */
gantt.load("./gantt_data", "xml");
/* refers to the 'data' action as well */
var dp = new gantt.dataProcessor("./gantt_data");
dp.init(gantt);
</script>
</body>
Create the Controller
Now, let’s configure the Controller object. Before we go any further, let’s take a look at how GanttConnector works. Here’s an example:
$connector->render_links(new $modelName, $id, $links);
$connector->render_table(new $modelName, $id, $tasks);
The GanttConnector constructor takes 2 parameters: null means that we want to use a model, not a database; PHPLaravel – the module for working with PHP.
The render_links method configures connector, retrieves data from a table with links and takes three parameters: the method creating a model for links, the name of the link id, and a comma-separated list of rendered links.
The render_table method configures connector and retrieves data from a table with tasks. It takes three parameters as well: the method creating a model for tasks, the name of the task id, and a comma separated list of rendered tasks.
To configure the Controller object you should create a new file named GanttController.php within the app/Http/Controllers folder:
namespace App\Http\Controllers;
use App\GanttTask;
use App\GanttLink;
use Dhtmlx\Connector\GanttConnector;
class GanttController extends Controller
{
public function data() {
$connector = new GanttConnector(null, "PHPLaravel");
$connector->render_links(new GanttLink(), "id", "source,target,type");
$connector->render_table(new GanttTask(),"id","start_date,duration,text,progress,parent");
}
}
Final Steps: Environment, Routes, and CSRF Protection
There are three final steps left before you can test your application. Let’s start from the environment configuration. The .env file that resides in the root folder of your project will be used for that purpose. All that we need is to configure the database. Here are the four lines that we are interested in:
DB_DATABASE=gantt
DB_USERNAME=root
DB_PASSWORD=yourpassword
You should define the hostname, name of the database that we’ve created earlier, username, and a password to allow Laravel use the data from a database.
The next step is to define the routes. Open the app/Http/routes.php file. Here’s the default routes configuration that you’ll find there:
return view('welcome');
});
Here’s what it means, in a nutshell. When you open the root folder of your website in a browser, the GET request will be performed. As a result, the welcome page from the resources/views folder will be returned. In fact, the name of this file is welcome.blade.php but Laravel disregards file extensions. What we need to do is to tell Laravel that the previously created view, gantt.php, should be returned. The other step is to use GanttController.php to save and load data. All you need to do is to replace the existing route with the following:
return view('gantt');
});
Route::match(['get', 'post'], '/gantt_data', "GanttController@data");
One more step before we can run the project. Laravel protects your application from cross-site request forgeries by generating a CSRF “token” for each active user session managed by the application. You can read more about the mechanisms of protection on this page if you want, but what we need to do now is to exclude one particular URI from CSRF protection. The one that triggered when created data is supposed to be saved. We need to add a proper value to the $except property in this file app/Http/Middleware/VerifyCsrfToken.php:
'gantt_data'
];
That’s it! Now we can test the application.
Running the Application
Open the root directory of your project and run:
Here’s the typical output:
Open http://localhost:8000/ in your browser and you’ll see the working Gantt chart:
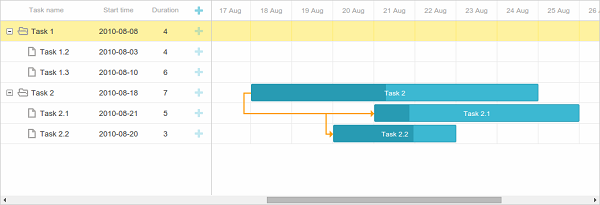
Here are the tasks from the database dump file that we’ve imported earlier. You can edit them or create your own, using the “+” button.
That’s all. We hope you have enjoyed the tutorial. The final application logic was not the goal of this article, but the interface built here is a good start for creating a fully-functional web application.