Updated on June 24, 2026
Great news for Vue.js lovers! Our dev team prepared a thorough guide on how to integrate our high-performing DHTMLX JS Scheduler with the progressive JavaScript framework Vue.js.
So, below is a step-by-step tutorial for creating a Vue Scheduler component with code snippets and illustrations. You can also kick-start the development process with a complete demo on GitHub.
New to DHTMLX Scheduler? Learn more about the library now >
1. How to Start
Firstly, you need to create an app skeleton. For this purpose, use vue-cli. If you don’t have one, you can easily install it with the node package manager using command (npm install -g @vue/cli). Check this article >
In order to use yarn in a project, it must be installed globally in the system (npm install -g yarn).
So, let’s run the next command to create an app:
It will request you to provide project information. You can choose to leave the default answers and press Enter for each question or select functions manually.
The next step is to go to the app directory, install dependencies and run your Vue.js app:
For using yarn call:
yarn dev
For using npm call:
npm run dev
Here we go – your app now runs on: http://localhost:5173
2. Moving to Scheduler Part
At this point, we need to get the code of DHTMLX Scheduler – a free version of it can be added from the private registry:
npm install @dhx/trial-scheduler --save (for npm)
As you need to add DHTMLX Scheduler to the Angular app, you have to create a component. Start from creating a folder for the app components – open the src folder and create the components folder in it. After that, create the SchedulerComponent.vue file in the components folder and add the next lines of code into it:
import { onMounted, onUnmounted, ref } from "vue";
import { Scheduler } from "@dhx/trial-scheduler";
const schedulerContainer = ref(null);
const schedulerInstance = ref(null);
onMounted(() => {
const scheduler = Scheduler.getSchedulerInstance();
schedulerInstance.value = scheduler;
scheduler.config.header = [
"day",
"week",
"month",
"date",
"prev",
"today",
"next",
];
scheduler.init(schedulerContainer.value, new Date(2027, 5, 10), "week");
});
onUnmounted(() => {
schedulerInstance.value?.destructor();
schedulerInstance.value = null;
if (schedulerContainer.value) {
schedulerContainer.value.innerHTML = "";
}
});
</script>
<template>
<div ref="schedulerContainer"></div>
</template>
<style>
@import "@dhx/trial-scheduler/codebase/dhtmlxscheduler.css";
.dhx_cal_container {
height: 100vh;
width: 100%;
}
</style>
Congrats! You’re done with the Scheduler component. When the element is added to the page, it will initialize the Scheduler under “schedulerComponent” ref. Afterward, the Scheduler will load data from the events property.
Right now, you need to finally add the component to the Vue.js application. Open App.vue and replace the code you’ve already had there with the next lines:
<script setup>
import Scheduler from "./Scheduler.vue"
</script>
<template>
<Scheduler/>
</template>
<style>
body, #app {
margin: 0;
padding: 0;
height: 100%;
width: 100%;
}
</style>
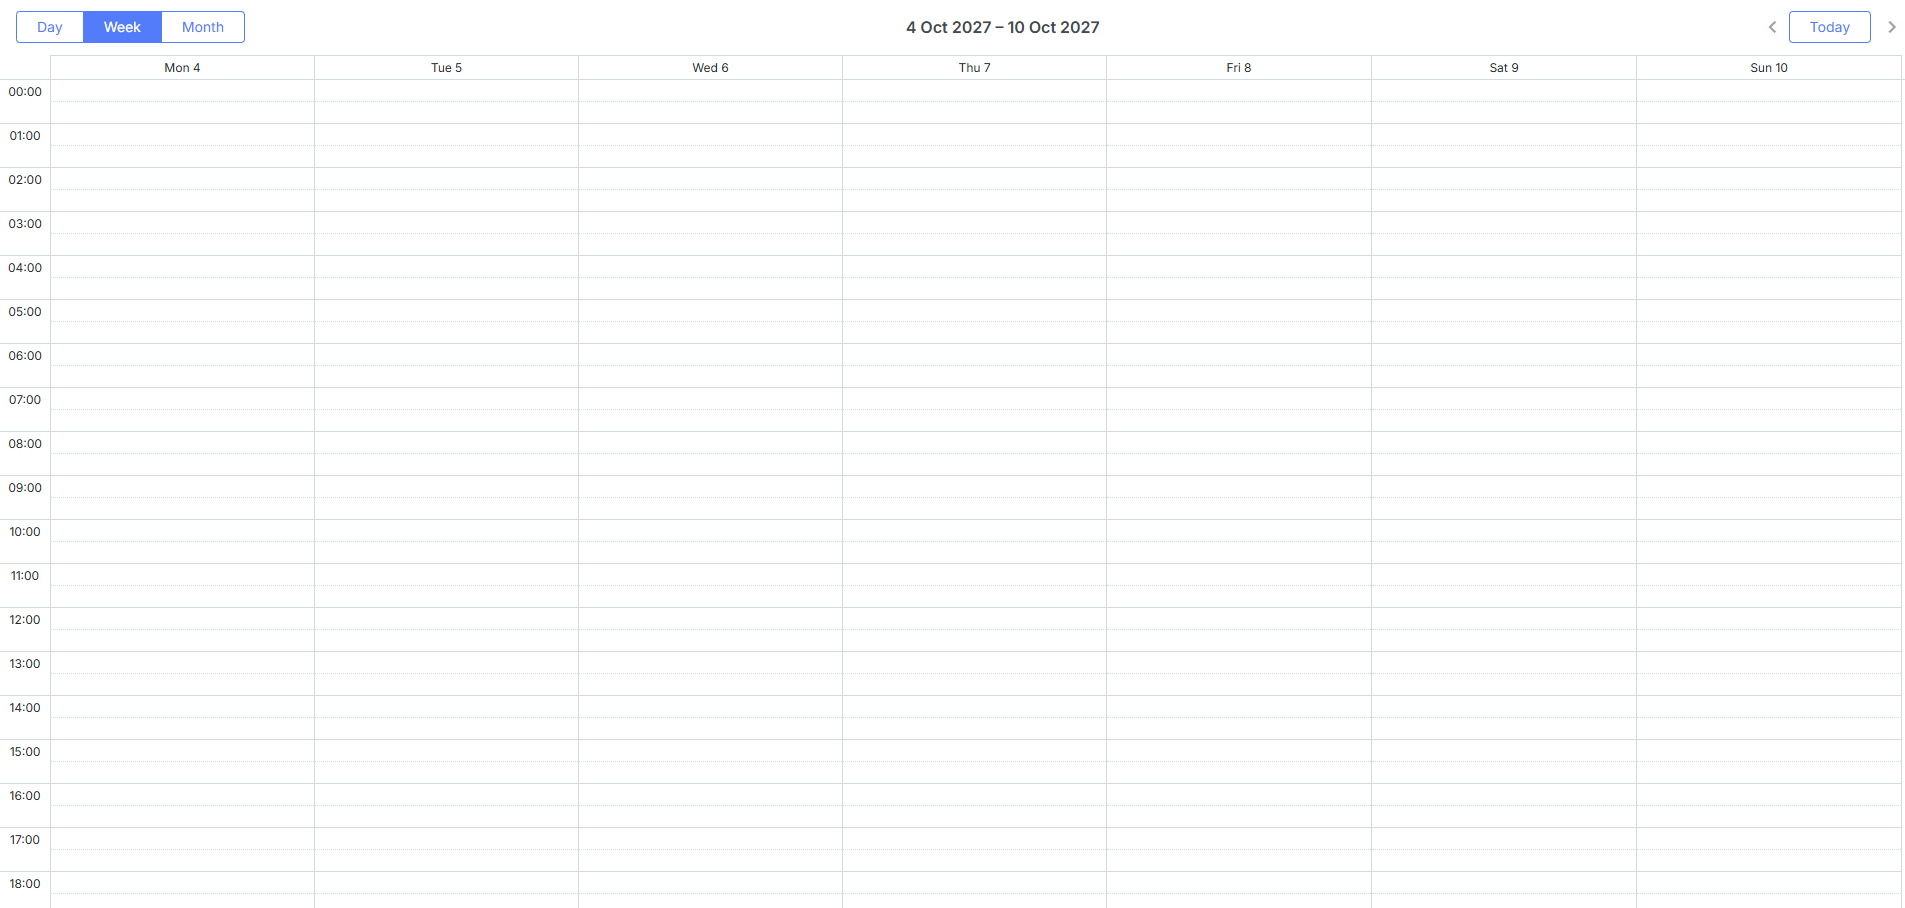
Once you are done, you will see DHTMLX Scheduler with predefined events on the page looking like that:
3. Listening to changes and handling events
Suppose you need to track and process changes made by users in our Scheduler – for example, show details of selected events in a separate form, update the data model of the parent component or send these changes to the backend. Simply put, you need the app to be aware of what’s going on inside Scheduler.
For that purpose, you can capture API events of DHTMLX Scheduler and $emit them to the parent component.
To make it clearer, let’s see how to create a simple changelog noting down all the changes made in Scheduler in a neat list on the right side of the page.
At first, you should go into the Scheduler component and add the code that will trace and emit Scheduler changes, like follows:
import { onMounted, onUnmounted, ref } from "vue";
import { Scheduler } from "@dhx/trial-scheduler";
const props = defineProps({
events: {
type: Array,
default: () => [],
},
});
const emit = defineEmits(["event-updated"]);
const schedulerContainer = ref(null);
const schedulerInstance = ref(null);
onMounted(() => {
const scheduler = Scheduler.getSchedulerInstance();
schedulerInstance.value = scheduler;
scheduler.config.header = [
"day",
"week",
"month",
"date",
"prev",
"today",
"next",
];
scheduler.init(schedulerContainer.value, new Date(2027, 5, 10), "week");
scheduler.parse(props.events);
scheduler.createDataProcessor((entity, action, data, id) => {
if (entity === "event") {
emit("event-updated", id, action, data);
}
});
});
onUnmounted(() => {
schedulerInstance.value?.destructor();
schedulerInstance.value = null;
if (schedulerContainer.value) {
schedulerContainer.value.innerHTML = "";
}
});
</script>
<template>
<div ref="schedulerContainer"></div>
</template>
<style>
@import "@dhx/trial-scheduler/codebase/dhtmlxscheduler.css";
</style>
What this code does is add handlers to the create/update/delete events of DHTMLX Scheduler. If some particular handler is called, it will trigger the Vue event on our component with parameters.
Secondly, you need to attach event listeners to the app component and write a log of actions in another div. Let’s do it this way:
<script setup>
import { ref } from "vue";
import SchedulerComponent from "./components/SchedulerComponent.vue";
const events = ref([
{ id: 1, start_date: "2027-06-10 6:00", end_date: "2027-06-10 8:00", text: "Event 1" },
{ id: 2, start_date: "2027-06-13 10:00", end_date: "2027-06-13 18:00", text: "Event 2" },
]);
const messages = ref([]);
let nextMessageId = 1;
function addMessage(text) {
messages.value.unshift({
id: nextMessageId,
text,
});
nextMessageId += 1;
if (messages.value.length > 40) {
messages.value.pop();
}
}
function logEventUpdate(id, mode, event) {
const eventText = event?.text ? ` (${event.text})` : "";
addMessage(`Event ${mode}: ${id} ${eventText}`);
}
</script>
<template>
<div class="container">
<SchedulerComponent class="left-container" :events="events" @event-updated="logEventUpdate" />
<div class="right-container">
<ul class="scheduler-messages">
<li class="scheduler-message" :key="message.id" v-for="message in messages">
{{ message.text }}
</li>
</ul>
</div>
</div>
</template>
<style>
html, body {
height: 100%;
margin: 0;
padding: 0;
}
.container {
display: flex;
height: 100%;
width: 100%;
}
.left-container {
overflow: hidden;
position: relative;
height: 100vh;
width: 80vw;
}
.right-container {
border-right: 1px solid #cecece;
float: right;
height: 100%;
width: 340px;
box-shadow: 0 0 5px 2px #aaa;
position: relative;
z-index:2;
}
.scheduler-messages {
list-style-type: none;
height: 50%;
margin: 0;
overflow-x: hidden;
overflow-y: auto;
padding-left: 5px;
}
.scheduler-messages > .scheduler-message {
background-color: #f4f4f4;
box-shadow:inset 5px 0 #d69000;
font-family: Geneva, Arial, Helvetica, sans-serif;
font-size: 14px;
margin: 5px 0;
padding: 8px 0 8px 10px;
}
</style>
With this code, you equip the app component with:
- the array property for storing log entries;
- method for adding a new message on top of our array so that new entries can be displayed first in our log;
- method for creating log messages for the actions performed with tasks and links and for adding them to the message stack.
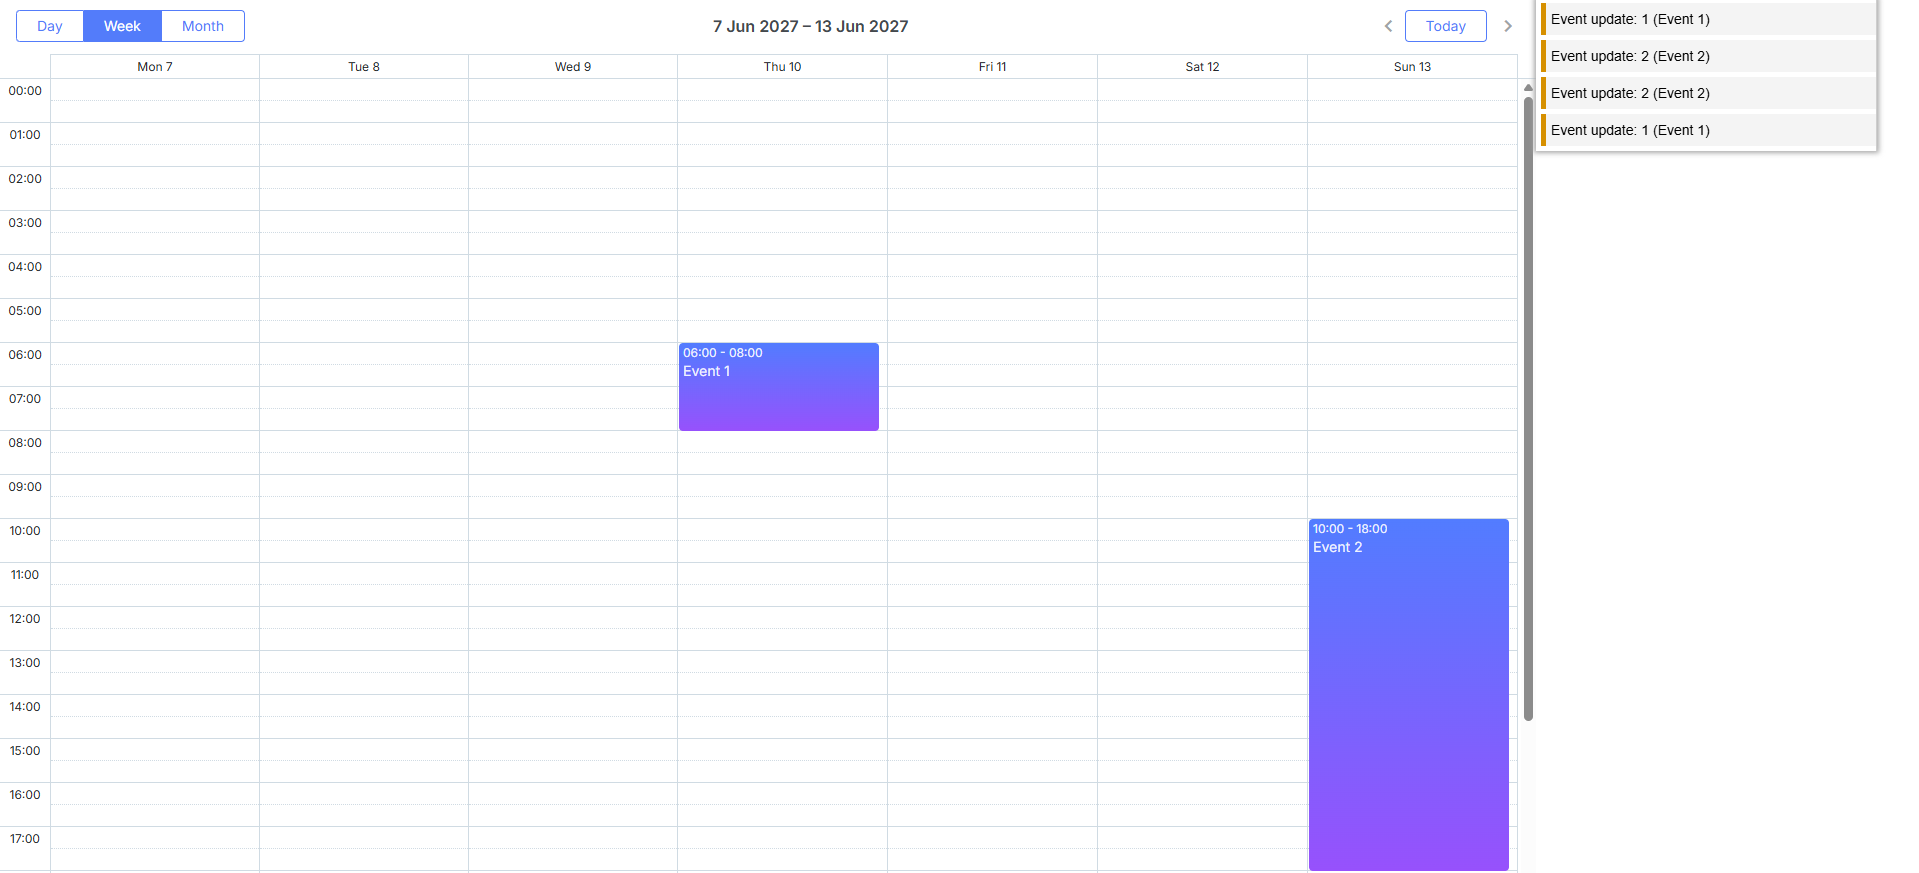
As a result, here you’ve created a simple two-column layout of DHTMLX Scheduler, attached log handlers to the Scheduler events emitted from the Scheduler module, added a container for log messages and bound them to our log messages stack.
Just to check everything works fine, try to make some changes to DHTMLX Scheduler – messages should be displayed on the right side:
These were three steps for creating a simple scheduling Calendar in Vue with DHTMLX. The demo application can be found in our GitHub repository.
If you follow the instructions above and face any difficulties, share them with us!
What Else You Can Do:
- Try out all Scheduler’s PRO features in a free trial version
- Scrutinize DHTMLX Scheduler documentation
- Play around with Scheduler live examples
- Participate in our small online survey “What matters in Scheduler components”