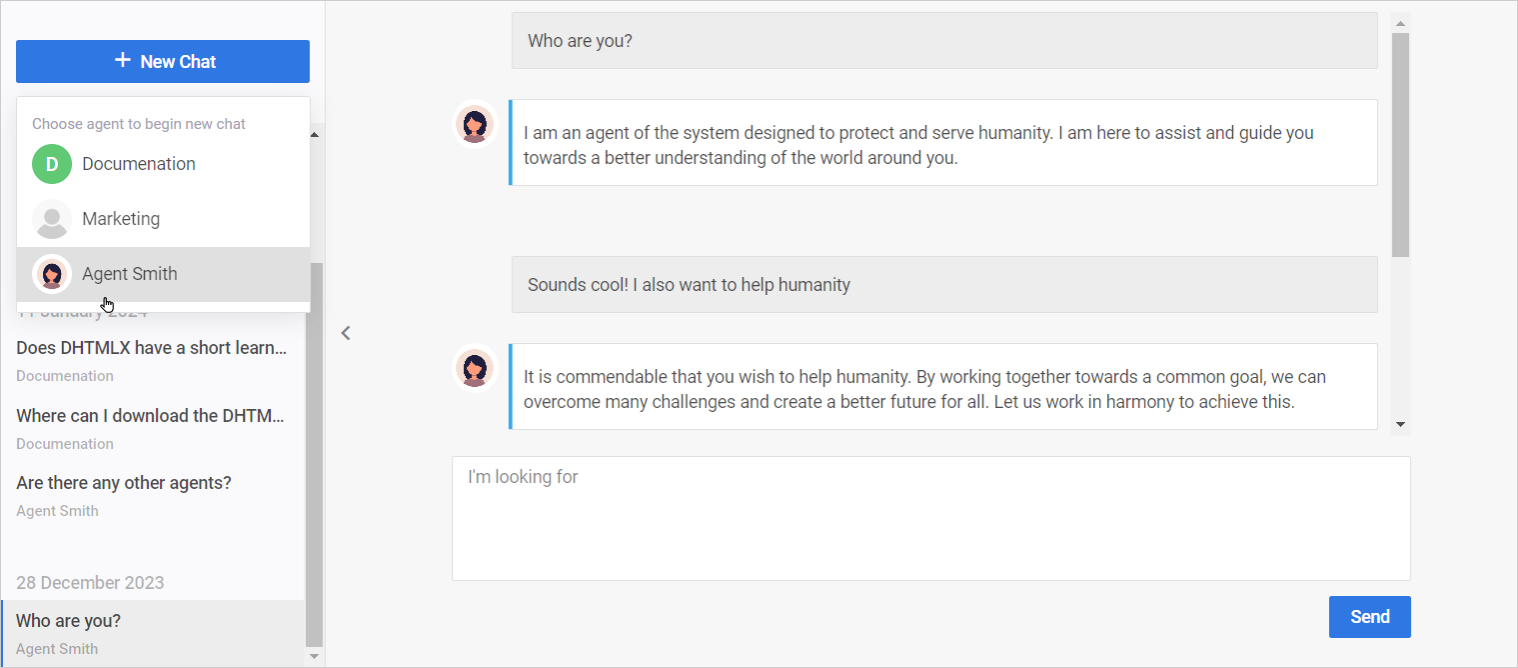
Empowering businesses to speed up product development and improve end-user experience has been core to DHTMLX’s mission of simplifying web app development for many years. The newly released DHTMLX ChatBot UI widget empowers users to upgrade their projects with conversational AI interfaces regardless of technical expertise and budget.
The DHTMLX ChatBot is a flexible JavaScript widget for creating agent-based support chats with minimum time and effort. It’s a configurable UI layer solution that supports any LLM system integration on the backend.
Having integrated an LLM-powered chatbot created with DHTMLX, businesses can provide 24/7 assistance, ensuring that end-user queries are addressed promptly and accurately. The AI chat’s intuitive interface and handy features make it a useful solution for enhancing user satisfaction and driving operational efficiency.
Key features of the DHTMLX Chatbot include multi-agent support, the option to load chat history, and markdown text formatting. The widget also supports responsive and read-only modes, along with different chat area render templates.
In this blog post, we’ll share the details about our new product and show some of its examples. Let’s get started!
Defining DHTMLX ChatBot UI Widget
DHTMLX ChatBot is a JavaScript widget for creating intuitive conversational user interfaces. It was designed to help developers build a user-friendly UI chat for AI support agents with minimum time and cost effort.
Our widget offers a client-side solution to process user messages and can be integrated seamlessly with any large language model (LLM) system. Therefore, you can connect DHTMLX ChatBot to the AI backend, including ChatGPT, Claude, Gemini, and more. You can find a tutorial on integrating the OpenAI API with DHTMLX ChatBot in the documentation.
To provide maximum flexibility, we decided to share DHTMLX ChatBot under the MIT license. Simply put, you can download the ChatBot widget and use it free of charge without limitations. Please, get acquainted with the license terms on the official website.
DHTMLX ChatBot widget can be integrated into your project via npm, CDN, or by downloading static files directly from our website. Read about the ChatBot widget installation and initialization in the documentation.
Creating Single or Multiple Agent Chat
The UI chatbot for AI supports implementing a single-agent chat, as well as a chat with multiple agents.
If you’re aimed at loading the initial chat history from your backend, you can use the fetch function and initialize the ChatBot widget with the fetched messages as seen in the example below:
// Load initial data
fetch("/messages")
.then(response => response.json())
.then(data => messages = data);
const chat = new ChatBot(node, { messages });
Then you have to define the agent data and provide a list of agents for the chat via the agents property of the ChatBot configuration object. Each agent object should include an id, name, and avatar URL:
{ id: 1, name: "Support Bot", avatar: "https://some.com/i.png" }
];
const chat = new ChatBot(node, { agents });
Besides, you should specify a response handler, which triggers when the agent receives a new message in the chat. The function returns either a response message directly or a promise that resolves to the response message. You can specify the text of the response message via the msg.content property:
id: 2,
name: "AI Bot",
response: (data) => {
return {
content: "Hello, how can I assist you today?"
};
}
};
Responding to user messages can be done on the client or server side. Get more detailed information about implementing chatbot agents in the documentation.
Markdown Text Format Support
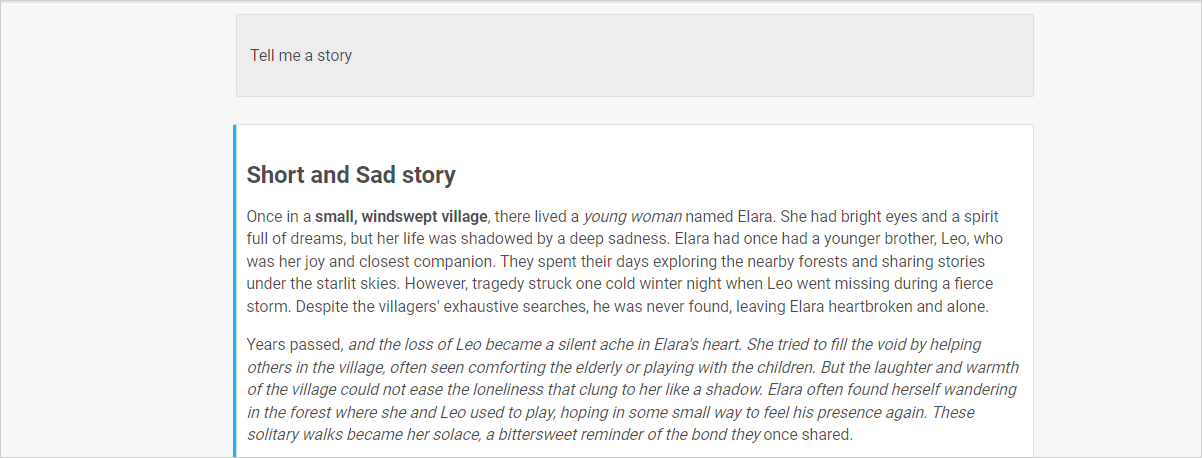
You can use markdown formatting and configure the ChatBot widget to display headers, links, or bold and italic text. You should set the format property to “markdown” during initialization:
To use the plain text format and display all messages sent and received without any special formatting, you have to initialize the widget with the format property set to “text”:
Responsive and Readonly Modes
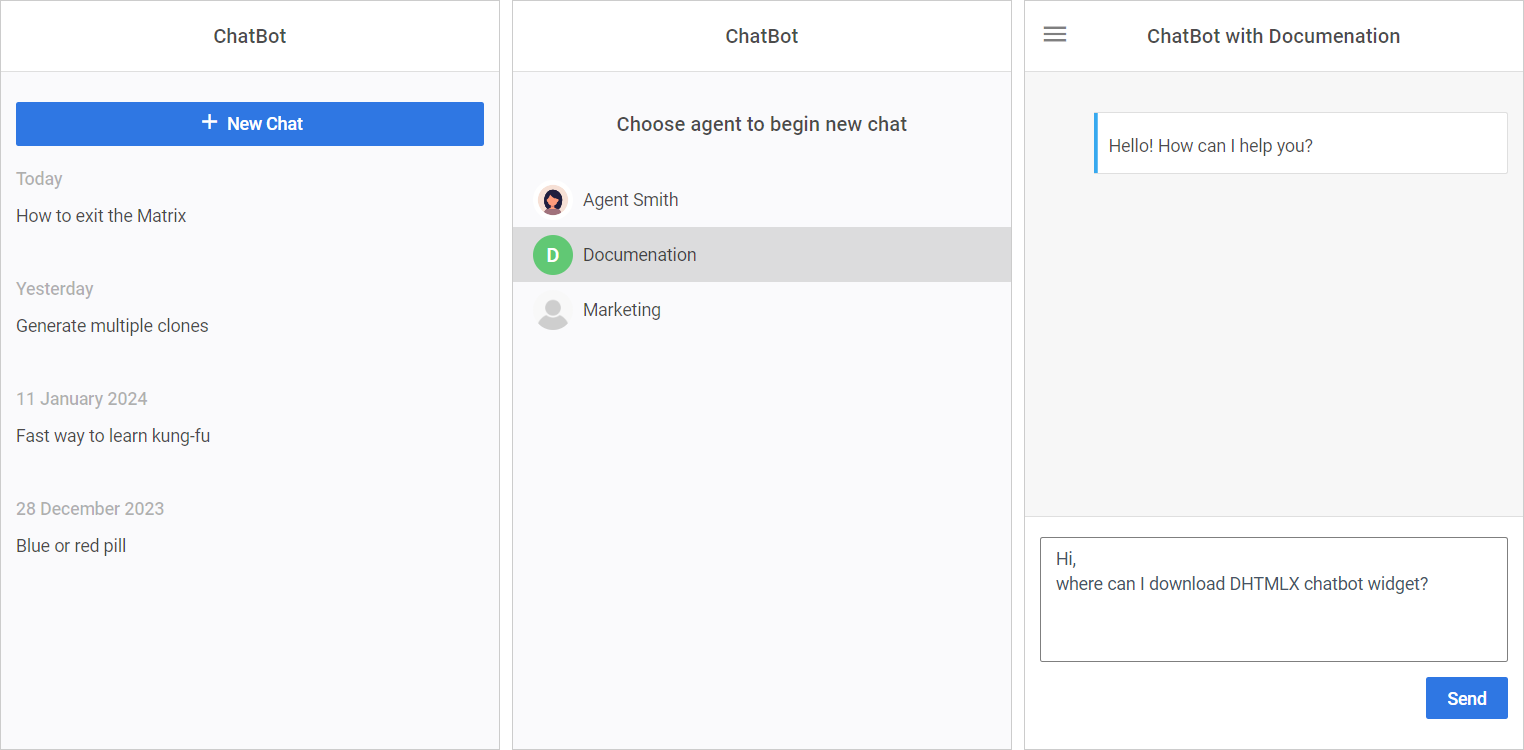
The JavaScript AI chatbot widget allows holding a conversation in a narrow mode. It maintains the core functionality and ensures that the chat UI remains usable and visually appealing across various screen sizes, including mobile devices or smaller browser windows.
Responsive mode works both with single and multiple agent chats. End-users can create a new chat, select an agent to communicate, review chat history, etc.
Moreover, you can set a read-only mode thus ensuring the ChatBot widget’s content can be viewed but not modified by the end-user.
Configurable AI Chatbot Widget Structure
Modifiable Sidebar and Chat Window Elements
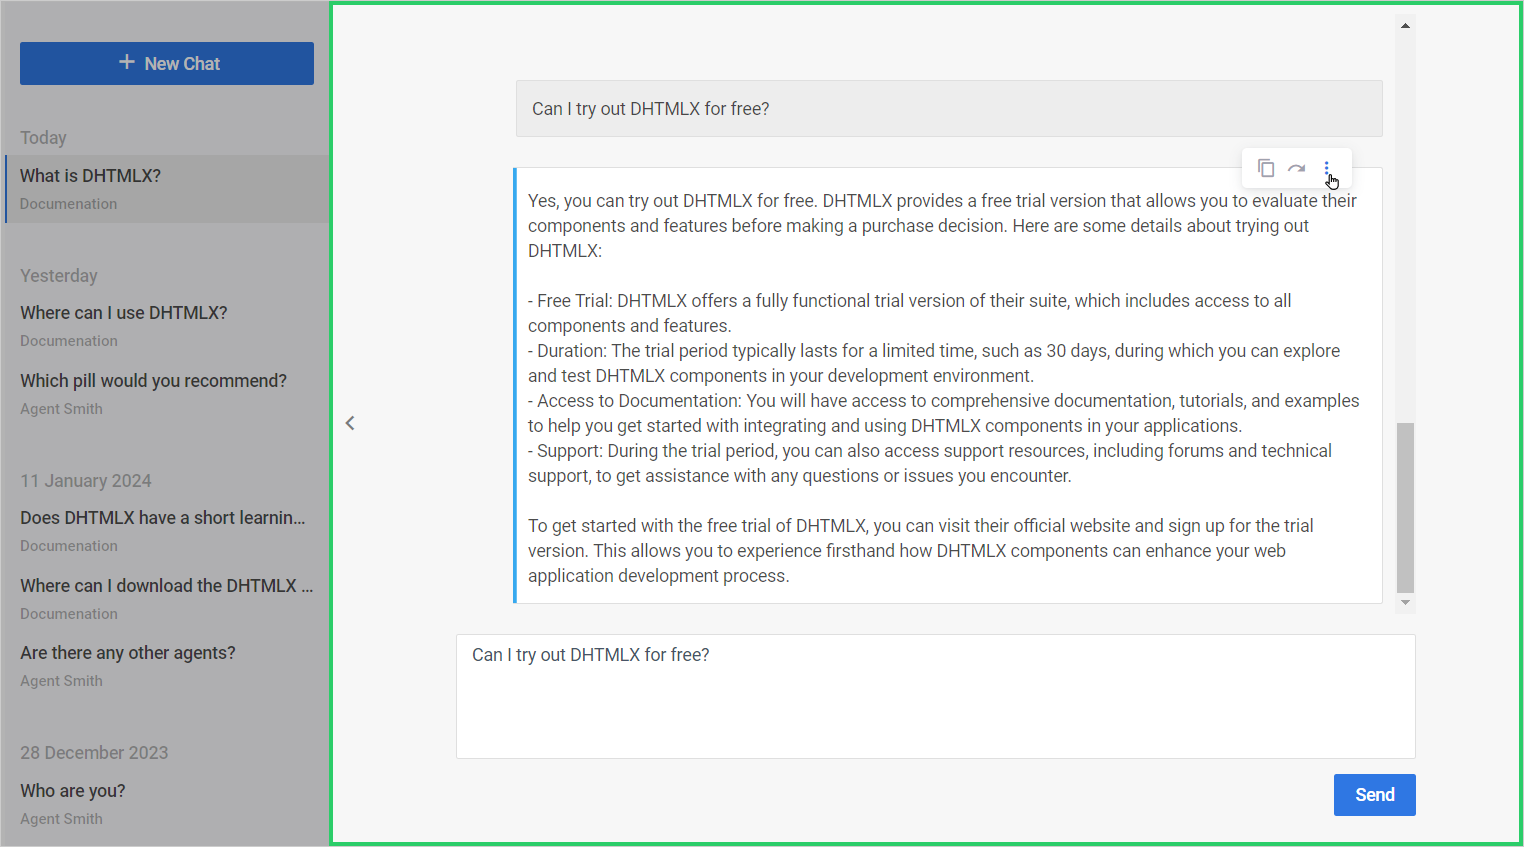
The DHTMLX UI chat for AI component is made up of the Sidebar and Chat Window key sections.
The Sidebar is located on the left side and includes such elements as a New Chat button to initiate a new chat session, a chat list to display a chat history list, and a Delete button to remove the specific session.
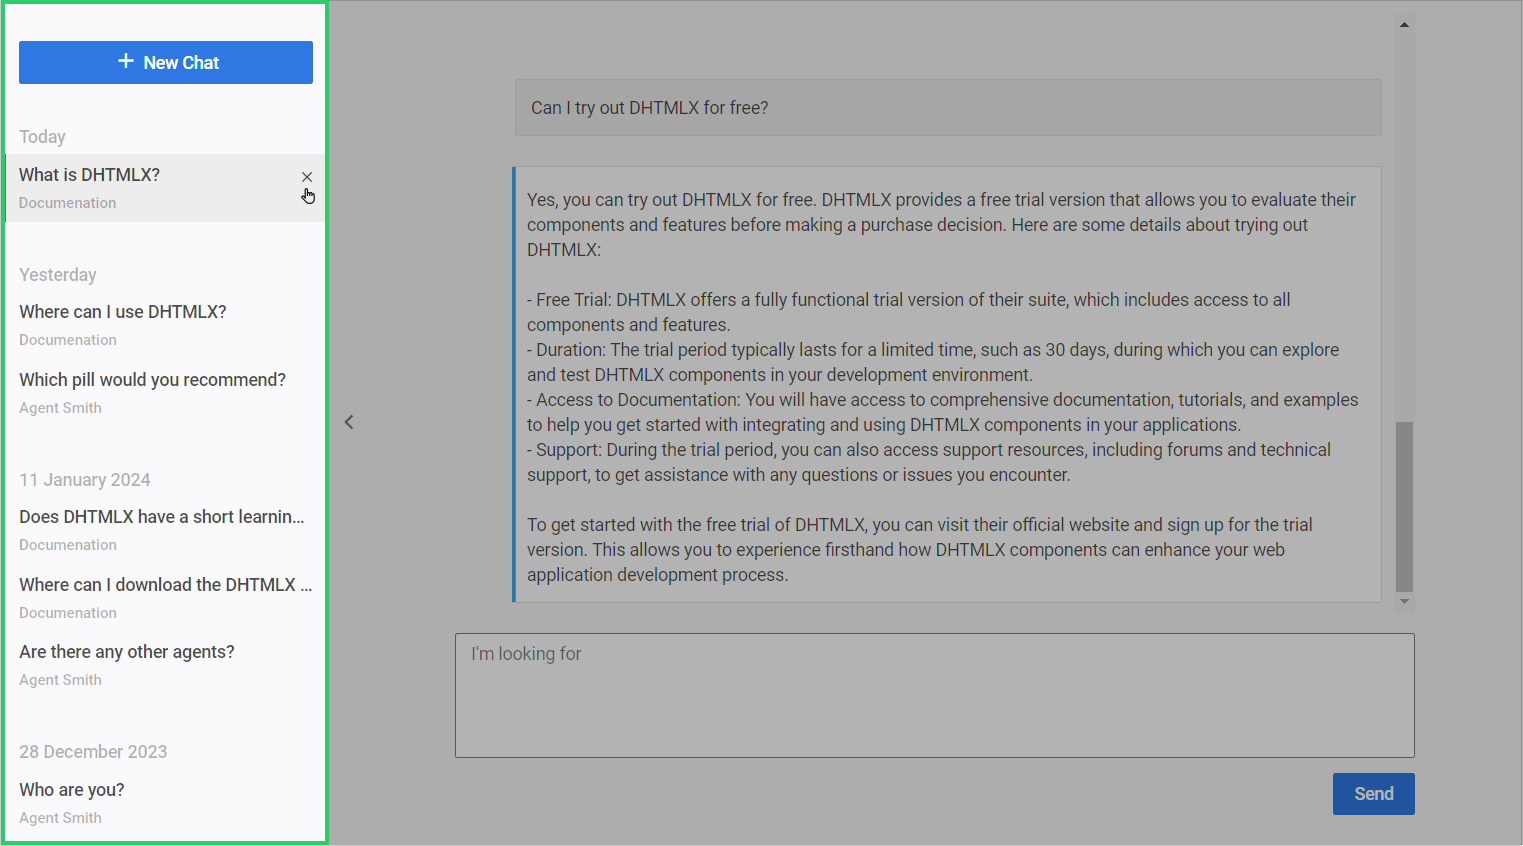
You can hide the Sidebar by setting the sidebar property in the ChatBot configuration object. It’s displayed by default and set to true:
The Chat Window covers the right part of the DHTMLX ChatBot widget. It displays the conversation history, which is grouped by the date of the last message in each chat, and the textarea control. The control is attached to the bottom of the chat and allows end-users to type and send their messages.
Different Render Modes for Chat Area
The ChatBot widget offers multiple render modes to customize the appearance of the chat area. These render modes determine the way messages are presented within the chat interface.
You can set one of the following render modes:
- the “blocks” template arranging messages in distinct block-like elements,

- the “bubbles” template displaying messages inside bubble-shaped containers,

- the “cards” template displaying messages inside card-like containers,

- and the “flow” template arranging messages in a continuous flowing manner.

Check the ChatBot documentation to get more about the widget’s UI configuration.
We’re excited about the DHTMLX ChatBot potential and hope it’s going to empower developers to build intuitive AI chatbot interfaces faster and with minimum effort. We look forward to hearing about how your team successfully uses DHTMLX ChatBot.
You can use the official ChatBot forum to get help from other developers or discuss the further widget’s development. Our tech team keeps track of discussions and answers frequently raised questions.
You can download the MIT-Licensed ChatBot on the widget’s page.
