DHTMLX Scheduler is a highly demanded JavaScript scheduling tool from our product portfolio used by many development teams in their project management apps. Therefore, we often receive requests and various ideas from our customers on improving the efficiency of this JavaScript component. Some of them revolve around the idea of using our Scheduler with various UI widgets and controls within a single project.
In this blog post, you will learn how to connect the DHTMLX Scheduler to the JavaScript List (or ListView) control from the latest version of our Suite UI library, thereby enabling end-users to move items (events) between them with drag-and-drop.
Guide on Connecting DHTMLX Scheduler with Suite’s List Control
High interoperability of DHTMLX products is a strong argument for using our Suite library when adding popular UI elements to your web project based on the Scheduler component. Instead of using some other third-party UI widgets that may have some hidden pitfalls, you can take advantage of any Suite widget or control, which can be easily integrated with our JavaScript Scheduler.
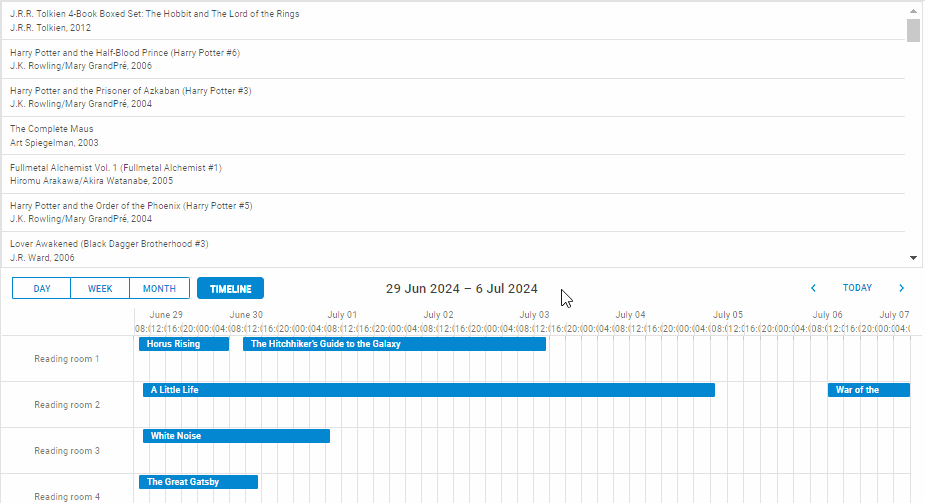
For instance, you can implement an additional event management option by connecting the Scheduler component to the List control just like in our demo below. In this sample, you can move items from the List to the Scheduler’s timeline and vice versa using drag-and-drop operations.
Here is a step-by-step guide on how to do this in your web project.
1. Initializing Scheduler with the Timeline view
First of all, you need to initialize DHTMLX Scheduler on a web page. You can do it using the header configuration property or via the Scheduler’s markup like in our demo. You can find detailed information on these initialization options in the documentation.
In our demo, we used the most popular Scheduler view – Timeline. You can also use other views supporting drag-and-drop such as Day/Week/Unit. The Timeline view is added with the corresponding plugin and the createTimelineView() method:
timeline: true,
drag_between: true
});
scheduler.locale.labels.timeline_tab = "Timeline";
scheduler.config.start_on_monday = true;
var sections = [
{ key: 1, label: "Reading room 1" },
{ key: 2, label: "Reading room 2" },
{ key: 3, label: "Reading room 3" },
{ key: 4, label: "Reading room 4" }
];
scheduler.createTimelineView({
name: "timeline",
x_unit: "hour",
x_date: "%H:%i",
x_step: 4,
x_size: 24,
x_start: 2,
x_length: 24,
y_unit: sections,
y_property: "section_id",
render: "bar",
second_scale: {
x_unit: "day",
x_date: "%F %d"
}
});
scheduler.init("scheduler_here", new Date(2024, 5, 29), "timeline");
As you can see from the above, the Scheduler configuration also includes the drag_between extension that allows moving events (items) outside the Scheduler. Here is the full guide to the Timeline view initialization.
2. Initializing List
Now you can proceed to initialize the DHTMLX List control using the dhx.List object constructor:
dragMode: "both", // the list both takes items from other lists and allows dragging its items out as well
css: "dhx_widget--bordered",
multiselection: true, // the possibility of dragging several items between lists
template: template
});
list.data.parse(data);
All steps of this process are fully described in this section of the documentation.
Then, you should also define a template for displaying data in the List:
let template = "<div class='list_item'>";
template += "<div class='item_name'>" + item.title;
template += "</div>";
template += "<div class='item_author'>";
template += item.authors + ", ";
template += item.publication_date.split("/")[2] + "</div>";
template += "</div>";
return template;
};
Just like in the Scheduler component, you also have to enable the capability to drag items to and from the List by adding the dragMode property with the “both” value.
At this point, you’ll have basic settings of both components, allowing end-users to drag events (items) only within the Scheduler and the List. Now you need to connect these components to make it possible to drag elements between them.
3. Dragging List Items to Scheduler
If you want to drag list items to the Scheduler, it is necessary to use the List’s afterDrag event that fires after the dragging of an item is finished.
You need to add an event listener to the Scheduler. To do that, you should get access to the Scheduler data area using the querySelector function:
Note: the necessary work with the List data is carried out via the dataCollection API (one of numerous Suite helpers), therefore you should look for the methods aimed at working with data in the corresponding documentation section.
In the afterDrag event, you get the List item data (itemData) using the getItem() method:
The next step is to get the position in the Scheduler timeline, where the dragged element will be dropped. To do that, use the getActionData() method, where the event parameter should be passed:
After you get the position for dropping the item in the Scheduler timeline, you need to dedicate some time to working with data. Specifically, you should do three things:
1. In Scheduler, use the addEvent() method to create an event that will contain the data of the dragged element. Take data from the getActionData() method (see above):
scheduler.addEvent({
start_date: adctionData.date,
end_date: scheduler.date.add(actionData.date, 1, "day"),
text: itemData.title,
authors: itemData.authors,
publication_date: itemData.publication_date,
section_id: adctionData.section
});
list.data.remove(data.start);
scheduler.updateView();
}
2. Delete the item dragged to the Scheduler timeline from the List data:
3. Make use of the updateView() method to repaint the Scheduler and display the event added with the addEvent() method:
scheduler.updateView()
Here is what you should get in the end:
let itemData = list.data.getItem(data.start);
let actionData = scheduler.getActionData(event);
if (schedEl.contains(event.target)) {
scheduler.addEvent({
start_date: adctionData.date,
end_date: scheduler.date.add(actionData.date, 1, "day"),
text: itemData.title,
authors: itemData.authors,
publication_date: itemData.publication_date,
section_id: adctionData.section
});
list.data.remove(data.start);
scheduler.updateView();
}
});
Now items can be dragged from the List and dropped in the Scheduler timeline, but you still cannot do the same with Scheduler events.
4. Dragging Scheduler Events to the List
To implement this final part, you will need to attach an event listener to the List container using its ID to determine the dropping of the Scheduler event.
After that, you should use the onEventDropOut event that fires when a dragged item is dropped to the area outside the Scheduler. Using the IF condition, you can determine if the element being moved is eventually dropped in the List/Scheduler. In the latter case, the drag operation will be canceled.
if (listEl.contains(e.target)) {
list.data.add({
title: ev.text,
authors: ev.authors,
average_rating: 4.59,
publication_date: ev.publication_date,
in_store: true,
isbn13: 9780345538376,
language_code: "eng",
num_pages: 1728,
ratings_count: 101233,
text_reviews_count: 1550,
publisher: "Ballantine Books"
},
All that remains is to find a particular position for the scheduler event in the list. You can do it by using the getIndex(). Knowing the element’s index under the cursor, it is possible to place the element above or below it.
After adding the Scheduler event to the List, you need to remove it from the Scheduler timeline using the deleteEvent() method. Here, you should also use the Suite’s dhx.awaitRedraw() helper to ensure that the event is deleted only after it is rendered in the List.
scheduler.deleteEvent(id)
})
Here is the final piece of code dedicated to moving Scheduler events to the List:
if (listEl.contains(e.target)) {
list.data.add({
title: ev.text,
authors: ev.authors,
average_rating: 4.59,
publication_date: ev.publication_date,
in_store: true,
isbn13: 9780345538376,
language_code: "eng",
num_pages: 1728,
ratings_count: 101233,
text_reviews_count: 1550,
publisher: "Ballantine Books"
}, list.data.getIndex(e.target.getAttribute("data-dhx-id") || e.target.closest("[data-dhx-id]").getAttribute("data-dhx-id")));
dhx.awaitRedraw().then(() => {
scheduler.deleteEvent(id)
})
}
return true;
});
That’s it. Following these instructions, you can add both DHTMLX Scheduler and Suite’s List to a web page and move items (events) between them with drag-and-drop as in our sample.
Conclusion
The tutorial vividly demonstrates the possibility of smoothly combining our JavaScript Scheduler component with the List control. The same approach will work well for integrating DHTMLX Scheduler with any other Suite UI widget supporting the drag-and-drop functionality. If you want to verify this claim, download free 30-day trial versions of DHTMLX Scheduler and Suite and get down to it.