NOTE: We’re now offering DHTMLX Scheduler .NET, a web control optimized for ASP.NET MVC. You can also find the latest version of Booking Calendar in MVC3 here.
In the previous MVC-related tutorial we described how to integrate dhtmlxScheduler into an ASP.NET MVC application. After publication, we received plenty of feedback, reflecting that the tutorial was helpful to many of ASP.NET MVC developers. Therefore we decided to continue this series and show you how to extend the calendar functionality to implement a room booking system.
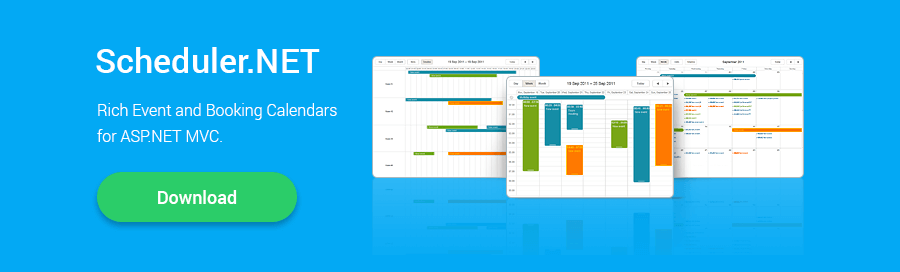
In this tutorial we’ll go further and add multi-user functionality to the scheduling system, allowing different users to make changes in the calendar simultaneously without impacting each other. As we already said, we’ll create a meeting room booking system which will look like on the screenshot below.
Download: the final package of the booking calendar for ASP.NET MVC

Room Booking Calendar with dhtmlxScheduler
In the end of the tutorial we should get a ready-to-use event scheduling application that allows end-users to add, delete, edit, and move events between rooms. Since we’re going to continue our previous tutorial, it’s assumed that you have already learned how to integrate the calendar into an ASP.NET MVC application. If not, please read it first: “Appointment Calendar for ASP.NET MVC with dhtmlxScheduler”.
Setting Goals
Now I will describe how to extend the functionality of our calendar to make it a complete, real-life web application. Here is the list of the features we’re going to implement:
- Events can be created only by authorized users
- A user can edit only events that he created
- Expired events can’t be edited
- Each event can be assigned only to one room from a list
- Users can see events by assigned room (room view)
- Users can see all events within a week (week agenda view)
- Events created by different users are colored differently
The list is not short, and you would spend a lot of time trying to implement such an application from scratch. Fortunately, most of the requirements can be achieved by using dhtmlxScheduler extensions and standard ASP.NET MVC solutions. So I believe we’ll manage to complete this task within half an hour.
Step 1 – Getting Started
In the previous tutorial we used dhtmlxScheduler 2.6, but recently the new version 3.0 has been released. The update includes lots of small bug-fixes and offers a number of new useful features that we might need.
So at first you need to update the dhtmlxScheduler package (available under GNU GPL). You can grab the most recent version from the Downloads page. After you download the package, copy the content from the folder ‘codebase’ to the folder ‘Scripts’ of your project, like we made before with the files of dhtmlxScheduler 2.x (new files will overwrite the old ones).
The new features that we will use in our booking application are:
- simple event colors (to set different colors for events created by each user)
- Week Agenda View (allows end-user to see all events within the current week)
Step 2 – Database Structure and .NET Membership
Our database should store information about available rooms and users that have access to the system. So let’s create a table ‘Rooms’ in our database with the following columns:
- room_id – id of the room
- title – name of the room
In order not to create user infrastructure manually, we will use the build-in ASP.NET Membership utility.
All we need to do is:
1. Run ASP.NET SQL Server Registration Tool (Aspnet_regsql.exe). The tool comes with the .NET framework and can be found under:
C:\WINDOWS\Microsoft.NET\Framework\\aspnet_regsql.exe.
Run the tool with the following keys:
It will create several tables (and a database, if it doesn’t exist yet):
- aspnet_Applications
- aspnet_Membership
- aspnet_SchemaVersions
- aspnet_Users
All these tables are used by the ASP.NET Membership for providing its functionality. We should edit only the table aspnet_Users by adding a column ‘color’ into it.
- color – the color of user’s events
To simplify things, let’s rename the mapping table ‘aspnet_User’ to ‘User’ and leave just the columns we will use, such as:
- UserId
- UserName
- color
2. Customize authorization-related controllers and views.
We will use the controllers and views generated by a standard MVC project. So you don’t need to create any new files, you just need to alter the existing ones a little:
- change the redirect path in the ‘AccountController.cs’
- remove default css processing
To link users and rooms with events, we add two more columns to the table ‘Events’:
- room_id – a foreign key for the ‘Rooms’ table
- user_id – a foreign key for the ‘aspnet_Users’ table
When you finish with this (created all the needed tables and added the missing columns), don’t forget to refresh MyEvents.dbml.
NOTE: If you don’t want to edit DB manually you can use db from the package with the sample files. It contains all needed tables and columns.

Database Tables
Step 3 – Authentication
Now all required conditions for authentication are provided, so we can add this functionality to our calendar. For that, we will need to make 3 things:
1. Add settings into the Web.config file:
<providers>
<clear/>
<add name="CustomMembershipProvider" type="System.Web.Security.SqlMembershipProvider"
connectionStringName="MyCalendarConnectionString"
enablePasswordRetrieval="false"
enablePasswordReset="true"
requiresQuestionAndAnswer="false"
requiresUniqueEmail="false"
maxInvalidPasswordAttempts="5"
minRequiredPasswordLength="1"
minRequiredNonalphanumericCharacters="0"
passwordAttemptWindow="10"
applicationName="/" />
</providers>
</membership>
Here ‘MyCalendarConnectionString’ is the name of the ‘connectionString’ attribute set in the same file. Generated views and controllers don’t need any corrections.
2. It’s not necessary that our app will have free registration, so we can remove the registration link from LogOn.aspx and related ‘action’ from the controller.
NOTE: In our sample we use a db that contains 2 test users. You can use the following username/password pairs to log in:
- username – test, password – test
- username – user, password – user
3. Add a link to LogOn in the Index.aspx file. View/Calendar/Index.aspx:
<div class="dhx_cal_navline">
<div class="" style="right:420px;height:23px;"> <% Html.RenderPartial("LogOnUserControl"); %></div>
...
After all these steps we’ll get a working calendar system which contains a user login form.

Scheduler – Month View
Step 4 – User Access Security
To provide user access control (according to our requirements), we need to add some checks on both client and server side.
Server-side checks are needed to provide security of the application. Client-side checks do not affect the application security and we could do without them, but it would make our system slow. So, we will define client-side checks to provide better performance and real-time user experience.
Client-side rules – Views/Calendar/Index.aspx:
//stores the name of the user in js var
<% if(Request.IsAuthenticated){ %>
scheduler._user_id = "<%= Model.User.UserId %>";
scheduler._color = "<%= Model.User.color %>";
<%} %>
//blocks all operations for non-authenticated users
scheduler.config.readonly = <%= Request.IsAuthenticated ? "false" : "true" %>;
//checks if an event belongs to a certain user and it's not started yet
var isEditable = function(event_id){
var ev = scheduler.getEvent(event_id);
return (ev && ev.start_date > new Date() && ev.user_id == scheduler._user_id);
};
//blocks operations for non-owned events
scheduler.attachEvent("onBeforeLightbox", isEditable);
scheduler.attachEvent("onBeforeDrag", isEditable);
scheduler.attachEvent("onClick", isEditable);
scheduler.attachEvent("onDblClick",isEditable);
//each time as a new event is created - it assigns a user, color and room
scheduler.attachEvent("onEventCreated", function(event_id){
var ev = scheduler.getEvent(event_id);
if (ev.start_date < new Date()){
scheduler.deleteEvent(event_id, true);
} else {
ev.user_id = scheduler._user_id;
ev.textColor = scheduler._color;
return true;
}
});
// ]]></script>
We will add the same rules to the server-side. If a user is not authorized to edit the events, or a user name doesn’t match the name of the current user, then changes won’t be saved and ‘error’ will be returned.
Controllers/CalendarController.cs:
{
...
if (Request.IsAuthenticated && changedEvent.user_id == (Guid)Membership.GetUser().ProviderUserKey && changedEvent.start_date > DateTime.Now)
{
...
//default processing logic
}
else
{
action_type = "error";
}
We have a few last things left at this step. We need to include the information about the event holder to our data feed and pass the needed models from the Index.aspx controller to the view.
Views/Calendar/Data.aspx:
">
<![CDATA[<%= String.Format("{0:dd/MM/yyyy HH:mm}",myevent.start_date) %>]]>
<![CDATA[<%= String.Format("{0:dd/MM/yyyy HH:mm}",myevent.end_date) %>]]>
<![CDATA[<%= Html.Encode(myevent.text)%>]]>
<![CDATA[<%= myevent.room_id %>]]>
<![CDATA[<%= myevent.username %>]]>
<% } %>
Also, we will specify the property ‘color’ for events. From this moment on, events created by a each user will be colored into appropriate color. Expired events, which can’t be edited, will be showed in grey color as disabled.
Views/Calendar/Data.aspx:
{
MyEventsDataContext context = new MyEventsDataContext();
User current_user = null;
if (Request.IsAuthenticated)
current_user = context.Users.SingleOrDefault(user => user.UserId == (Guid)Membership.GetUser().ProviderUserKey);
return View(new CalendarModel(current_user, context.Rooms.ToList());
}
Here ‘CalendarModel’ is a class that contains information about the current user and available rooms (creating a list of available rooms is our next step).
This is how our Scheduler will look like. In Month View we can see the events displayed in different colors by a user who created them. The old events are displayed in grey color and can’t be edited.

Room Booking Calendar – Colored Events
After these changes, we’ve achieved our main goal and created a multi-user calendar. All users can see all the events, but events can be edited only by a user who created them.
Step 5 – Agenda View and Unit (Room) View
In compliance with the requirements we’ve set in the beginning, we will add the ability to show events by room and view all events within the current week.
To see the list of events taking place within the current week, we can use Week Agenda View, a new feature available in dhtmlxScheduler 3.0. All we need to do is to add the appropriate script and button to the Index.aspx file.
Views/Calendar/Index.aspx:
...
The image below shows how our booking calendar will look in Week Agenda View. We can see the list of events assigned per each day of the week.

Room Booking Calendar – Week Agenda View
To show events by the assigned room, we will use Unit View of dhtmlxScheduler. Let’s make the necessary modifications in the Index.aspx file:
...
Also, we should add JavaScript code to configure the new view in the calendar.
Views/Calendar/Index.aspx:
scheduler.locale.labels.section_room = "Room:";
//a list of rooms
var rooms = [<% for(var i =0; i < Model.Rooms.Count; i++){ %>
{key:<%= Model.Rooms[i].room_id %>, label:"<%= Html.Encode(Model.Rooms[i].title) %>"}<%= i
<% } %>];
//helper, returns room number by id
function getRoom(id){
for(var i in rooms){
if(rooms[i].key == id)
return rooms[i].label;
}
}
//units view
scheduler.createUnitsView({
"name": "units",
"list": rooms,
"property": "room_id"
});
Now we can see events by room number. This view allows users to check the availability of each room and find the best place and time for each event.

Room Booking Calendar – Unit View
Step 6 – Providing Better User Experience
To simplify user interactions with the calendar, we will add the ability to select a room number directly from the event lightbox of the calendar. To achive this, we will define our own configuration for the event details form instead of the default one in the Index.aspx file:
scheduler.config.lightbox.sections = [
{name:"description",height:200,map_to:"text",type:"textarea",focus:!0},
{name:"room",map_to:"room_id",type:"select",options:rooms},
{name:"time",height:72,type:"time",map_to:"auto"}
];
Our custom event lightbox now has an additional select box with room numbers:

Room Booking Calendar – Custom Event Lightbox
To give users more information about the event, we can add room number to the event description. Add in Views/Calendar/Index.aspx:
function template(start,end,ev){
return getRoom(ev.room_id) + " : " + ev.text;
}
scheduler.templates.event_text = template;
scheduler.templates.agenda_text = template;
scheduler.templates.event_bar_text = template;
scheduler.templates.week_agenda_event_text = function(start_date, end_date, event, date) {
return scheduler.templates.event_date(start_date) + " " + template(start_date, end_date, event);
};
And again, here is the final look of our room booking calendar:
Room Booking Calendar with dhtmlxScheduler
If you have followed these 6 steps of our tutorial, you now have a multi-user calendar that allows end-users to easily book meeting rooms and arrange the events between rooms.
Referring back to the assigned requirements, you can see that each requirement has been fully implemented and it all took us about 30 minutes. The impressive result for such a complex application, huh? :)
You can download the final Room Booking Calendar package with all files and assets.