Project management is a complex and multifaceted process. According to Capterra, key project management software features include project planning/scheduling, task management, project tracking, prioritization, and time tracking. A Kanban task board covers most of these needs. That is why many businesses invest in the development of taskboard apps.
And here DHTMLX Kanban can come in handy. Our developer-friendly library comes with a wide range of built-in features that can be easily enabled or disabled, if desired. Thus development teams can build a multifunctional JavaScript taskboard and adjust it to their needs much faster using multiple configuration and customization options. The taskboard structure consists of 3 main elements: Toolbar, Board (with task cards), and Editor. The widget allows managing one or several projects at once and adding any number of cards to them. With such a solution at hand, business people get a visual representation of task workflow and get the opportunity to manage their activities more efficiently. Moreover, DHTMLX Kanban can be easily integrated with other JavaScript libraries from our product line (Gantt, Scheduler, To Do List) for delivering all-encompassing software solutions.
In this post, we highlight the main aspects of building a basic JavaScript/HTML taskboard with DHTMLX.
Setting up the Environment for the Taskboard
Precondition: create a basic HTML page, where your taskboard will be placed.
Now we can proceed to the first stage, namely, setting up the development environment.
First of all, you need to download a free 30-day trial version of the DHTMLX Kanban library. The next step is to unpack the package into a folder of your project and add two source files (JS and CSS) to your HTML document:
<script src="./dist/kanban.js"></script>
<link href="./dist/kanban.css" rel="stylesheet">
</head>
Alternatively, it is possible to import Kanban into your project via npm. To get access to the trial version of our Kanban component, run the following command:
npm i @dhx/trial-kanban
Initializing the Taskboard (DHTMLX Kanban)
Before you can start initializing your JavaScript taskboard, it is required to add a div container with the unique ID (for instance, “root”) to the HTML page. Here it is important to mention that Toolbar is an optional UI element and you will need a separate div container for it.
<div id="toolbar"></div>
<div id="root"></div>
</body>
The same applies to the initialization process itself, i.e. to initialize the taskboard with the toolbar, you will need two corresponding constructors – kanban.Kanban and kanban.Toolbar. Both containers take two similar parameters:
- the ID of the HTML container
- the corresponding configuration object
Adding Data to the Taskboard
Now it is time to provide a foundation for your task board by adding the initial data for columns, rows, and cards. Let us consider, for instance, the work on a website divided into two different areas (sub-projects) – content and design.
In our case, the columns config includes four workflow stages:
{
label: "Scheduled tasks",
id: "scheduled tasks",
},
{
label: "In progress",
id: "inprogress",
},
{
label: "Done",
id: "done",
},
{
label: "Verified",
id: "verified",
},
];
In the rows property, rows (swimlanes) are added for managing two different kinds of activities such as content and design within a single taskboard:
{
label: "Content",
id: "content",
},
{
label: "Design",
id: "design",
},
];
And finally, the cards property is used for loading cards data:
{
label: "Discount offers for upcoming holidays",
priority: 1,
color: "#65D3B3",
start_date: new Date("01/07/2023"),
users: [3, 2],
column: "scheduled tasks",
type: "content",
},
{
label: "Update old blog posts",
priority: 3,
color: "#58C3FE",
users: [4],
progress: 11,
column: "scheduled tasks",
type: "content",
},
{
label: "Landing page for a new product",
priority: 1,
color: "#58C3FE",
start_date: new Date("01/09/2023"),
users: [3, 1],
progress: 10,
column: "scheduled tasks",
type: "design",
},
{
label: "SEO optimization for the main page",
color: "#FFC975",
start_date: new Date("01/06/2023"),
users: [4],
progress: 50,
column: "inprogress",
type: "content",
},
{...}
];
You can also make use of the parse() method to load data for rows, columns, and cards of your JavaScript taskboard. This method takes an object with the required data as a parameter.
// loading data for the taskboard
board.parse({ columns, cards, rows });
Configuring the Taskboard
The next step is to give you a clear idea of how to configure the task board created with DHTMLX Kanban. In this section, you will learn how to configure the main taskboard elements and some useful features.
Toolbar
As has been mentioned above, the Toolbar is an optional UI element, but it still can be extremely useful for overall control over your work with tasks. The toolbar may include a range of controls for performing various operations. You can enable end-users to search for specific cards, manage the task history with undo/redo actions, sort cards, and add new rows and columns.
Under the hood, all required Toolbar controls are specified in the items property:
api: board.api,
items: [
"search",
"spacer", // creates empty space between controls
"undo",
"redo",
"sort",
"addColumn",
"addRow",
]
}
Task Cards
Cards are the key elements of the task board displayed in rows and columns. Each card may provide a lot of useful information about a certain task. For instance, you can add the task’s name, priority status, start and end dates, assignees, task progress, number of comments and votes, and a context menu.
To make task cards more informative with these parameters, you should specify them in the cardShape property. In our sample, it is done the following way:
label: true,
description: true,
progress: true,
comments: true,
votes: true,
start_date: true,
end_date: true,
users: {
show: true,
values: users,
},
priority: {
show: true,
values: [
{ id: 1, color: "#FF5252", label: "high", value: 1 },
{ id: 2, color: "#FFC975", label: "medium", value: 2 },
{ id: 3, color: "#65D3B3", label: "low", value: 3 },
],
},
color: true,
menu: true,
cover: true,
attached: false,
};
If you do not specify the appearance of cards using the cardShape property, the component will automatically apply the default config.
Task Editor
The editor panel serves to modify the card data on the fly. End-users just need to click on the needed task to open its editor and then introduce the necessary changes. All the card settings named in the previous section can be managed via the corresponding fields and controls of the editor.
Plenty of field types (select, multiselect, combo, text, etc.) are available for configuring the editor structure. They are implemented via the editorShape property. If you don’t have any specific requirements for the editor configuration, you can save time and use the defaultEditorShape set of parameters (just like with the cards config).
In our sample, we use default settings complemented with the ability to add, update, and delete comments in cards.
columns,
cards,
rows,
rowKey: "type",
cardShape,
editorShape: [
...defaultEditorShape,
{
type: "comments",
key: "comments",
label: "Comments",
config: {
placement: "editor",
},
},
],
currentUser: 1,
});
Here is an example of what you should get in the end:
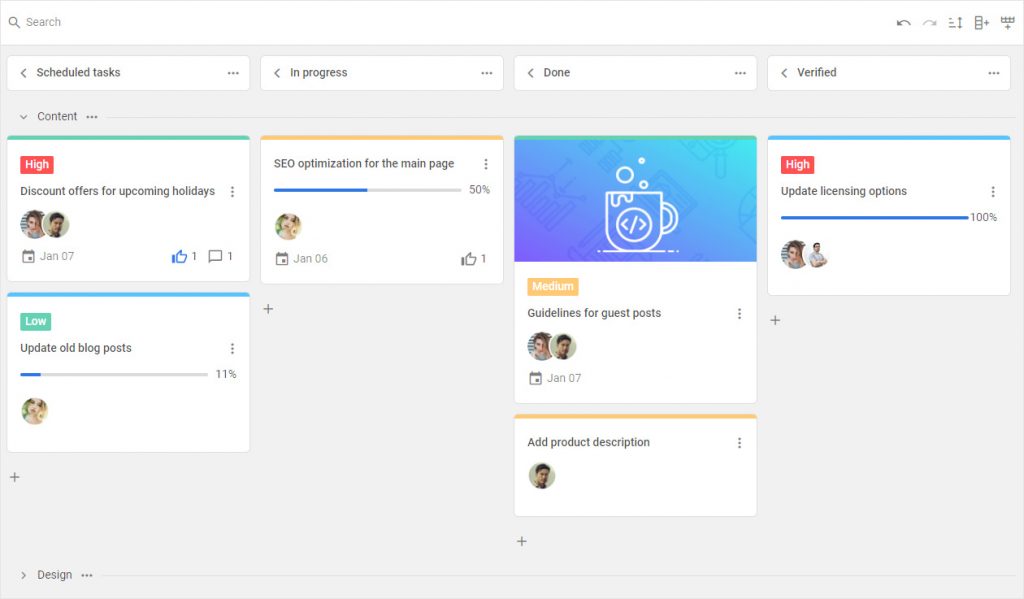
The full information related to the configuration of the JavaScript taskboard based on DHTMLX Kanban can be found in the corresponding section of our documentation.
Customizing Taskboard Cards
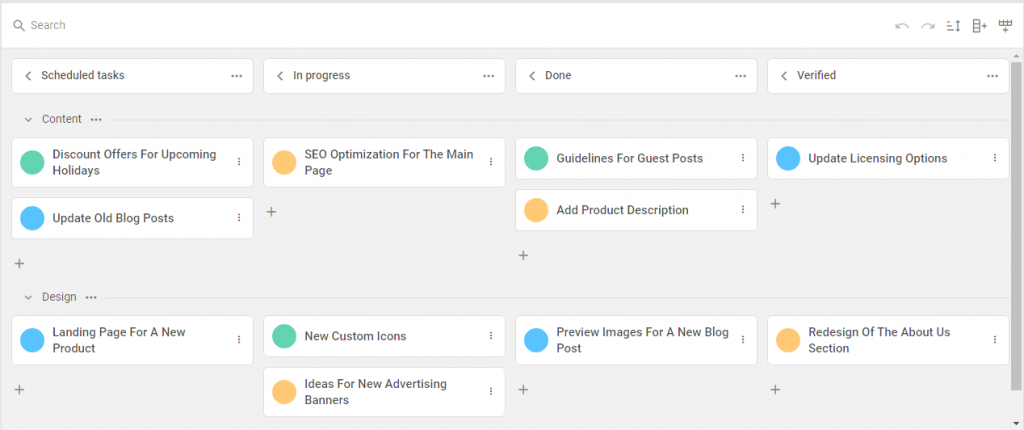
Just like other JavaScript libraries from our product line, DHTMLX Kanban is quite flexible in terms of customization. The API offers multiple possibilities for adjusting the taskboard appearance and behavior to your requirements. For instance, let us consider how to customize task cards.
For this purpose, you should apply a custom task template specified with the cardTemplate configuration property.
 Check the sample >
This and other customization options are described in the documentation.
Taskboard Stylization
With DHTMLX Kanban, you have many opportunities for styling your JavaScript/HTML task board.
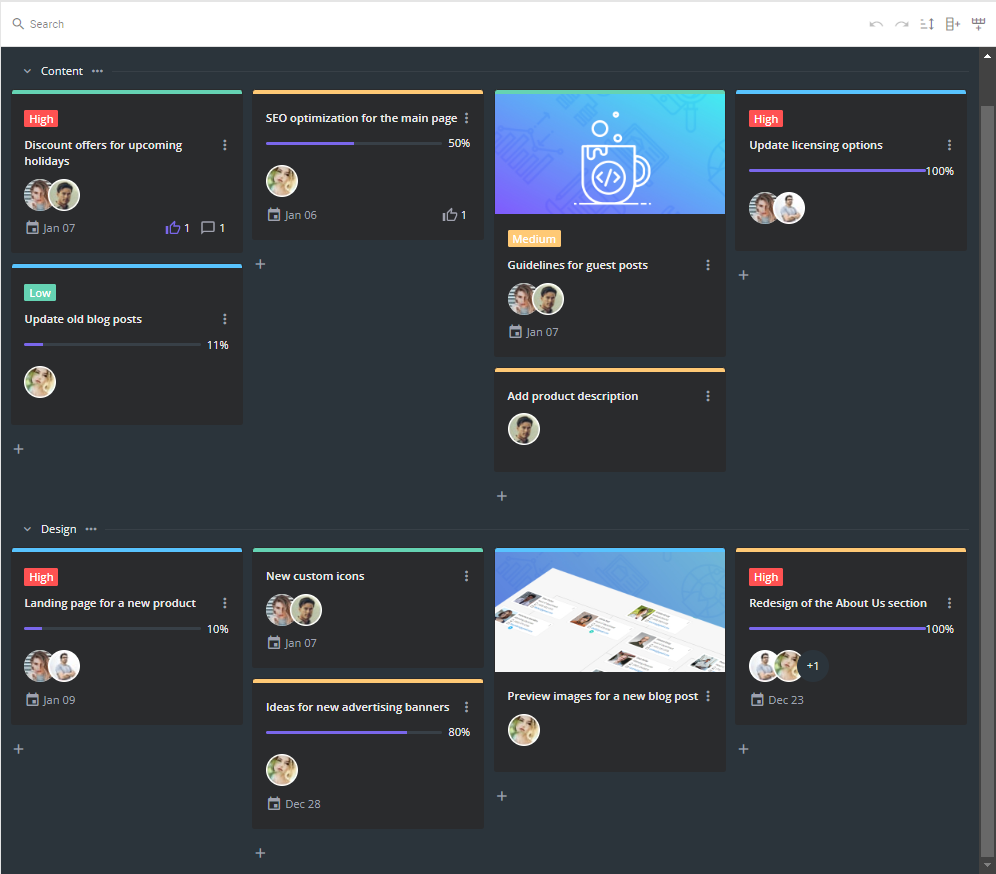
Here you can play around with the overall look of your project using built-in themes (Material (default), Willow, Willow-Dark). The required theme can be specified in the theme property.
That’s how our demo looks like with the Willow-Dark theme:
 Check the sample >
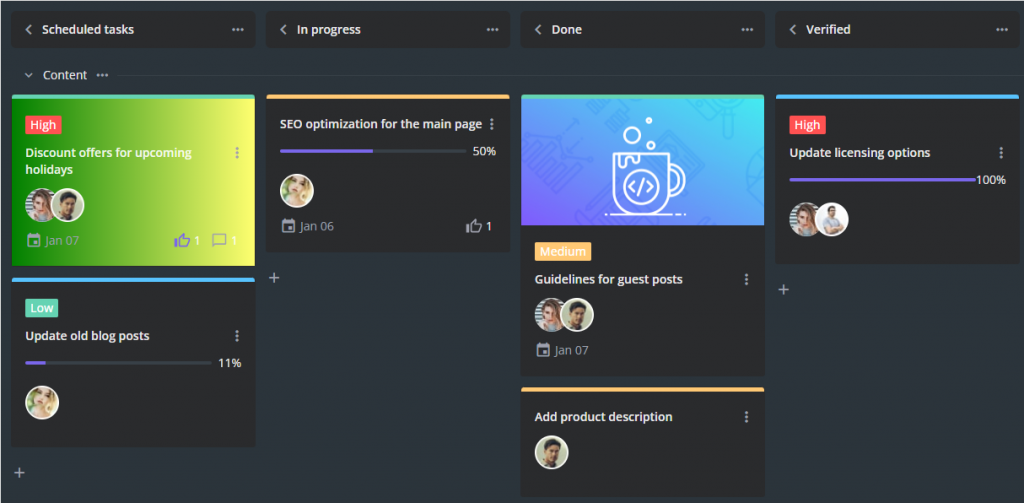
Moreover, you can also fine-tune separate elements of the taskboard UI (rows, columns, cards) via corresponding properties. In our example, the css parameter in the cards config helps to apply a gradient color to one task.
 Check the sample >
More details on the subject are provided in the documentation.
Conclusion
Summarizing all the above, it can be said that adding a JavaScript taskboard to a web page should not be a problem with DHTMLX Kanban. Our library comes with a variety of configuration and customization options that will certainly facilitate the whole process. You can use DHTMLX with any backend technology. We have ready-made examples of Go and Node backends for Kanban. And on top of that, you can also integrate DHTMLX Kanban with other DHTMLX tools such as Gantt, Scheduler, and To Do List for building comprehensive project management apps.