The DHTMLX component library offers a pure JavaScript/CSS solution for building web interfaces. The advantage of developing with the client-side library is that you can use it with your favorite server-side technology. In this tutorial, we will explain how to use the DHTMLX UI components with one of the most popular PHP frameworks, Yii framework.
The tutorial describes how to integrate dhtmlxGrid and dhtmlxScheduler in a Yii application. You’ll learn how to bind the grid and the scheduler to the database and update data on the server when user makes changes on the client side.
The integration with Yii will be done through the dhtmlxConnector layer, which handles client-server data communication. This tutorial gives step-by-step instructions but it is assumed that you have the basic knowledge of the Yii framework and the DHTMLX library.
Download the files of the final demo and keep reading to learn how to use DHTMLX with the Yii framework.
Getting Started
Before continuing, make sure that you have Yii installed on your computer. If you don’t, refer to the installation guide to learn how to do it.
Download the packages:
In the root folder of your app, create a sub-folder with the name ‘DHTMLX’. Add the required JS/CSS files of dhtmlxConnector, dhtmlxGrid, dhtmlxScheduler, and dataProcessor (included in both dhtmlxGrid and dhtmlxScheduler packages) to the ‘DHTMLX’ folder, or simply copy the folder with the required files from the final demo package (find the download link above).
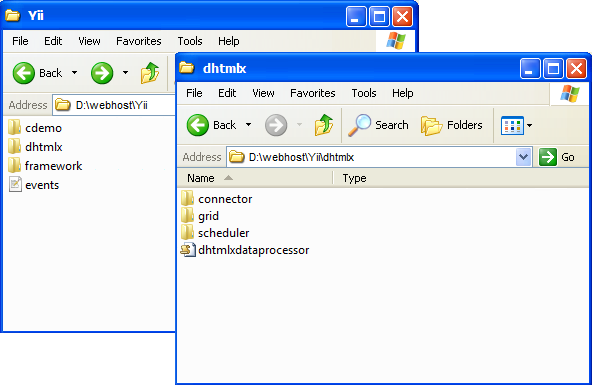
Thus, you have two folders in the root folder of your demo app: one with Yii files, and the other one with DHTMLX files:

In our demo Yii app, we use the events database. You can create a local copy of this database by importing the SQL dump file events.sql (find it in the root folder of the final package) or you can just use any available database. Note that if you use your own database, you will need to adapt the code examples by yourself.
Creating Model Class
To connect our web application to the database, we need to create a model class. You can make it by using the built-in web-based code generator Gii. For more details of generating a model class, read Creating Your First Yii Application article in the Yii documentation.
The newly created Events model class allows us to access the backend database ‘events’ table, which stores our data for the grid and the scheduler.
Grid Integration
Creating Controller Object
In the ‘controllers’ folder (which is automatically created by Yii framework), create a new file and name it EventController.php. Place the following code within this file:
• Add the files required for working with dhtmlxConnector and create a root controller class EventController with the primary action:
require_once(dirname(__FILE__)."/../../../dhtmlx/connector/grid_connector.php");
require_once(dirname(__FILE__)."/../../../dhtmlx/connector/scheduler_connector.php");
require_once(dirname(__FILE__)."/../../../dhtmlx/connector/db_phpyii.php");
class EventController extends Controller {
public function actionIndex()
{
$this->render('index');
}
// here you should place all your functions
}
?>
Note that we’ve also added the connector files for the scheduler, which will be required for the scheduler integration described below. If you don’t plan to use the scheduler in your app, just do not include the file ‘scheduler_connector.php’.
• Create an action that will load a view displaying the grid:
{
$this->render('grid'); //loads the 'grid' view that we will create later
}
• Create an action that will load data to the grid:
{
$grid = new GridConnector(Events::model(), "PHPYii");
$grid->configure("-", "event_id", "start_date, end_date, event_name");
$grid->render();
}
GridConnector takes as parameters a DB connection variable and a database type. Since we’re working with Yii, these parameters have the following values:
– refers to the model Events used in the app,
– a constant value.
The configure method generates an SQL query and takes as parameters:
- ‘-‘ – a hardcoded value
- $id – the name of the id field
- $text – a comma separated list of rendered data fields
- $extra – (optional) a comma separated list of extra fields
- relation_id – (optional) used for building hierarchy in case of Tree and TreeGrid
You can see the resulting EventController.php file in the demo package. This file processes all the operations with data (add, edit, remove records) and saves the changes made by user to the database on the server.
Creating View Object
In the ‘views’ folder create a new file and name it grid.php. In the view file, add the following code:
<head>
<meta http-equiv="Content-type" content="text/html; charset=utf-8">
<script src="/dhtmlx/grid/dhtmlxcommon.js" type="text/javascript" charset="utf-8"></script>
<script src="/dhtmlx/grid/dhtmlxgrid.js" type="text/javascript" charset="utf-8"></script>
<script src="/dhtmlx/grid/dhtmlxgridcell.js" type="text/javascript" charset="utf-8"></script>
<script src="/dhtmlx/dhtmlxdataprocessor.js" type="text/javascript" charset="utf-8"></script>
<script src="/dhtmlx/connector/connector.js" type="text/javascript" charset="utf-8"></script>
<link rel="stylesheet" href="/dhtmlx/grid/dhtmlxgrid.css" type="text/css" media="screen" title="no title" charset="utf-8">
<link rel="stylesheet" href="/dhtmlx/grid/skins/dhtmlxgrid_dhx_skyblue.css" type="text/css" media="screen" title="no title" charset="utf-8">
</head>
<body>
<div id="grid_here" style="width:600px; height:400px;"> </div>
<script type="text/javascript" charset="utf-8">
mygrid = new dhtmlXGridObject('grid_here');
mygrid.setHeader("Start date,End date,Text");
mygrid.init();
mygrid.loadXML("./grid_data"); //refers to the 'Grid_data' action we created in the previous step
var dp = new dataProcessor("./grid_data"); //refers to the 'Grid_data' action as well
dp.init(mygrid);
</script>
</body>
It’s a standard code that initializes dhtmlxGrid on a page. If you have already worked with the grid component before, it won’t be difficult for you to understand the code. If anything is not clear, refer to the grid documentation.
When the grid.php file is ready, run webhost/cdemo/event/grid. The page should now display the grid filled with data from the server-side database. The grid is editable and all the changes you make in grid are saved to the database.

Scheduler Integration
Creating Controller Object
We have already created EventController.php file (see the instructions for the grid integration above). Now we just need to add the following code to display the scheduler on a page and fill it with content from the database table:
• Create an action that will load a view displaying the scheduler:
{
$this->render('scheduler'); //loads the 'scheduler' view that we will create later
}
• Create an action that will load data to the scheduler:
{
$scheduler = new SchedulerConnector(Events::model(), "PHPYii");
$scheduler->configure("-", "event_id", "start_date, end_date, event_name");
$scheduler->render();
}
Creating View Object for Scheduler
The next step is creating a view file for the scheduler. In the ‘views’ folder create a new file and name it scheduler.php. The file should include the following code:
<head>
<meta http-equiv="Content-type" content="text/html; charset=utf-8">
<script src="/dhtmlx/scheduler/dhtmlxscheduler.js" type="text/javascript" charset="utf-8"></script>
<link rel="stylesheet" href="/dhtmlx/scheduler/dhtmlxscheduler_glossy.css" type="text/css" media="screen" title="no title" charset="utf-8">
</head>
<body>
<div id="scheduler_here" class="dhx_cal_container" style='width:800px; height:600px;'>
<div class="dhx_cal_navline">
<div class="dhx_cal_prev_button"> </div>
<div class="dhx_cal_next_button"> </div>
<div class="dhx_cal_today_button"></div>
<div class="dhx_cal_date"></div>
<div class="dhx_cal_tab" name="day_tab" style="right:204px;"></div>
<div class="dhx_cal_tab" name="week_tab" style="right:140px;"></div>
<div class="dhx_cal_tab" name="month_tab" style="right:76px;"></div>
</div>
<div class="dhx_cal_header">
</div>
<div class="dhx_cal_data">
</div>
</div>
<script type="text/javascript" charset="utf-8">
scheduler.config.multi_day = true;
scheduler.config.xml_date="%Y-%m-%d %H:%i";
scheduler.config.first_hour = 5;
scheduler.init('scheduler_here',new Date(2010,7,5),"week");
scheduler.load("./scheduler_data");
var dp = new dataProcessor("./scheduler_data");
dp.init(scheduler);
</script>
</body>
Again, we used a standard code that initializes the scheduler component. For a deeper learning of dhtmlxScheduler initialization, read the documentation.
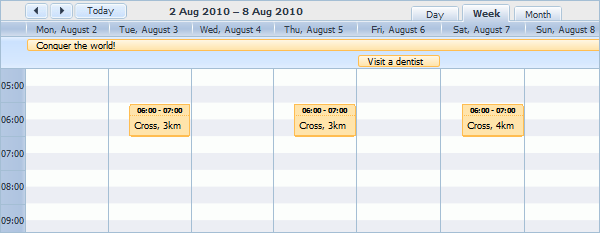
Now, if you run webhost/cdemo/event/scheduler, you should see the scheduler that loads data from the ‘events’ table in the database. The same as with the grid – all changes made in the scheduler are saved to the database. Users can create, modify or delete events, and the data in the database will be updated automatically.

That’s all. We now have a Yii demo application created with dhtmlxGrid, dhtmlxScheduler, and the dhtmlxConnector library. We have integrated editable data grid and scheduler that can update the database table when user make changes on the client side. The application logic was not the goal of the tutorial but we hope that this example will inspire you to create fully functional web apps with DHTMLX and Yii.
Download the demo files and get a closer look to the integration approach.
We also have the tutorials explaining how to integrate the DHTMLX components with other PHP frameworks. Check these articles in the documentation: