Hello, guys! Are you looking for another way to make your scheduling apps handier? In case you are, I’ll show you how to zoom in and out of timelines in DHTMLX Scheduler just like you do it while viewing maps.
I’ll guide you through implementing zoom in Scheduler. This will let your end-users choose the types of the time scale and easily switch between them by a single turn of a mouse wheel. In the end, you’ll create a scheduler like this:
It zooms through time and it’s blue, just like the Tardis, isn’t it? Well, are you sitting comfortably? Then I’ll begin.
Creating Timelines
First of all, you need to include the necessary files and create a container for Scheduler on the page. If you are new to DHTMLX Scheduler, read a tutorial on how to create a scheduler on a page.
Next, initialize Scheduler and parse the data (here I have the data in the JSON format, but other formats are as well possible):
scheduler.parse(sched_data,"json");
When you do this, you’ll have a scheduler like this:
Looks pretty confusing, too many things seem to happen at the same time. That’s why you need timelines: they help structure events. Suppose you want to distribute events that are to be held in different places. Define them:
{key:1, label:"Room A"},
{key:2, label:"Room B"},
{key:3, label:"Room C"}
];
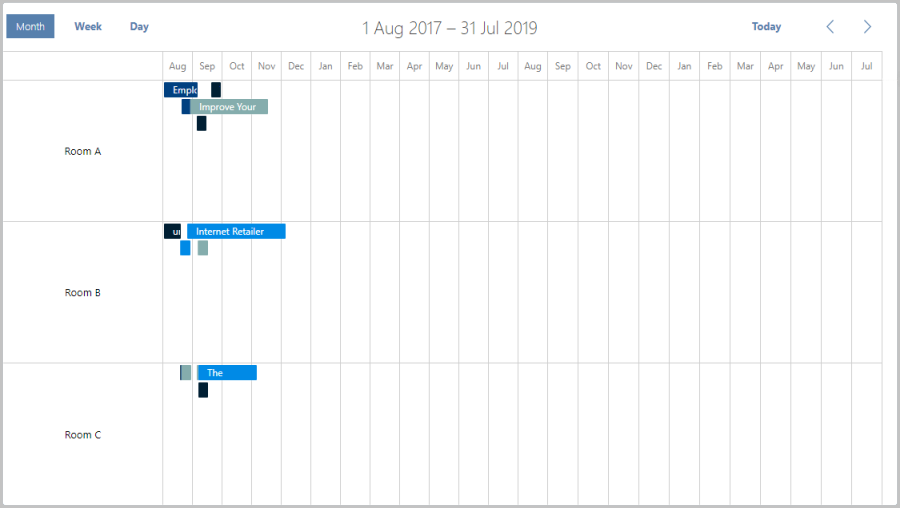
Let’s create three configurations of the same timeline with different zooming levels: month, week and day. Here is the month level:
name: "timeline1",
x_unit: "month",
x_date: "%M",
y_unit: sections,
y_property: "section_id",
render: "bar"
});
The other two levels are created by analogy, but with different x-scales:
name: "timeline2",
x_unit: "day",
x_date: "%M %d",
//...
});
scheduler.createTimelineView({
name: "timeline3",
x_unit: "hour",
x_date: "%H:%i",
//...
});
Now let’s add tabs for the different zooming levels:
<div class="dhx_cal_navline">
...
<div class="dhx_cal_tab"></div>
<div class="dhx_cal_tab"></div>
<div class="dhx_cal_tab"></div>
</div>
...
</div>
Good. Next, add the tab names before the initialization:
scheduler.locale.labels.timeline2_tab = "Week";
scheduler.locale.labels.timeline3_tab = "Day";
Now zooming levels are in place and I can add the final stroke for this step. Let’s change the initialization a bit (you can initialize with any zooming level, while I’ve chosen “month”):
scheduler.init("scheduler_here",new Date(2017,7,17),"timeline1");
Note that in the first line I disabled the default position of tabs so that zooming tabs could take the position of the usual ones.
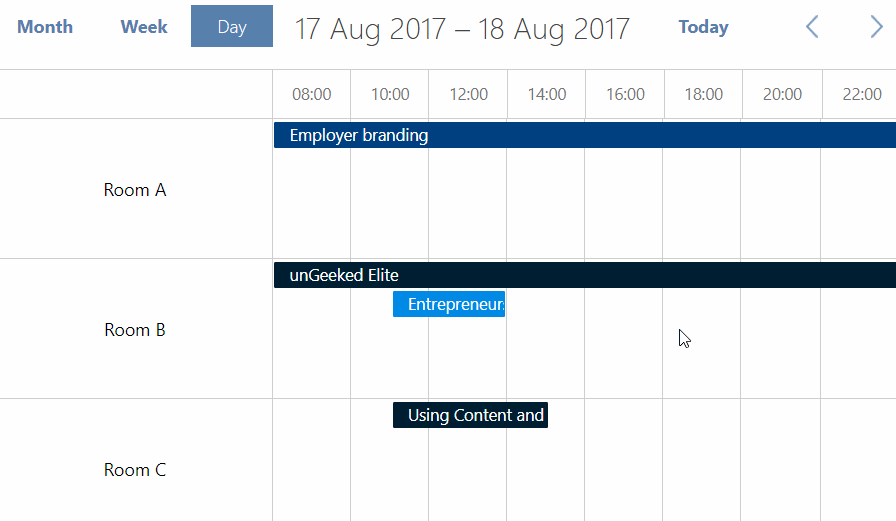
At this stage you’ll have a scheduler like this:
Still doesn’t look right, though you can switch between the views by clicking the tab buttons. Let’s configure our timelines.
Configuring Timelines
Let’s define additional properties that will help to display the scales right:
//...
x_step: 1,
x_size: 12,
//...
});
scheduler.createTimelineView({
//...
x_step: 1,
x_size: 7,
//...
});
scheduler.createTimelineView({
//...
x_step: 2,
x_size: 8,
x_length: 12,
//...
});
Besides, let’s define the starting points for every zooming level. Without them, you might find yourself in quite unexpected time periods after every switch:
return new Date(date.getFullYear(), 0, 1, 0, 0);
};
scheduler.date.timeline2_start = function(date){
return new Date(date.getFullYear(), date.getMonth(), date.getDate() - date.getDay(), 0, 0);
};
scheduler.date.timeline3_start = function(date){
return new Date(date.getFullYear(), date.getMonth(), date.getDate(), 8, 0);
};
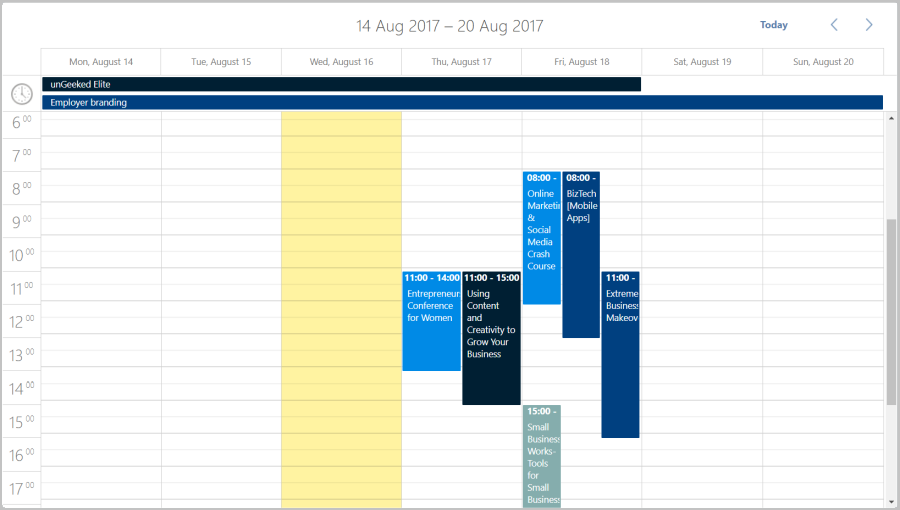
Looks fine now:
Now let’s add some gear to really zoom through time.
Zooming through Timelines Enabled
First, add an event listener for the wheel event, which fires whenever you rotate a wheel button of your mouse or some other pointing device:
//change mode
var state = scheduler.getActionData(e);
var mode = scheduler.getState().mode;
var num = mode.substr(8,1);
if (state && state.date){
if (e.deltaY < 0)
num++;
else
num--;
if (num>0 && num<4)
scheduler.setCurrentView(state.date, "timeline"+num);
}
});
The handler takes one parameter – the WheelEvent object, which was used to return the current cursor-pointed date and section (with the getActionData(e) method) and to define the new zooming level (by testing the deltaY value). If the date and section of the timeline that were pointed with a cursor are defined, the name is changed and validated, and you’ll see another level of the timeline.
Okay. Next, to prevent you from zooming too fast and crashing somewhere far away, let’s add four lines of code:
document.querySelector("#scheduler_here").addEventListener("wheel", function(e){
//prevent too fast scrolling
var time = new Date();
if (time - last_used < 200) return;
last_used = time;
//change mode
//...
});
If you try turning the wheel faster than 5 times per second, nothing will happen.
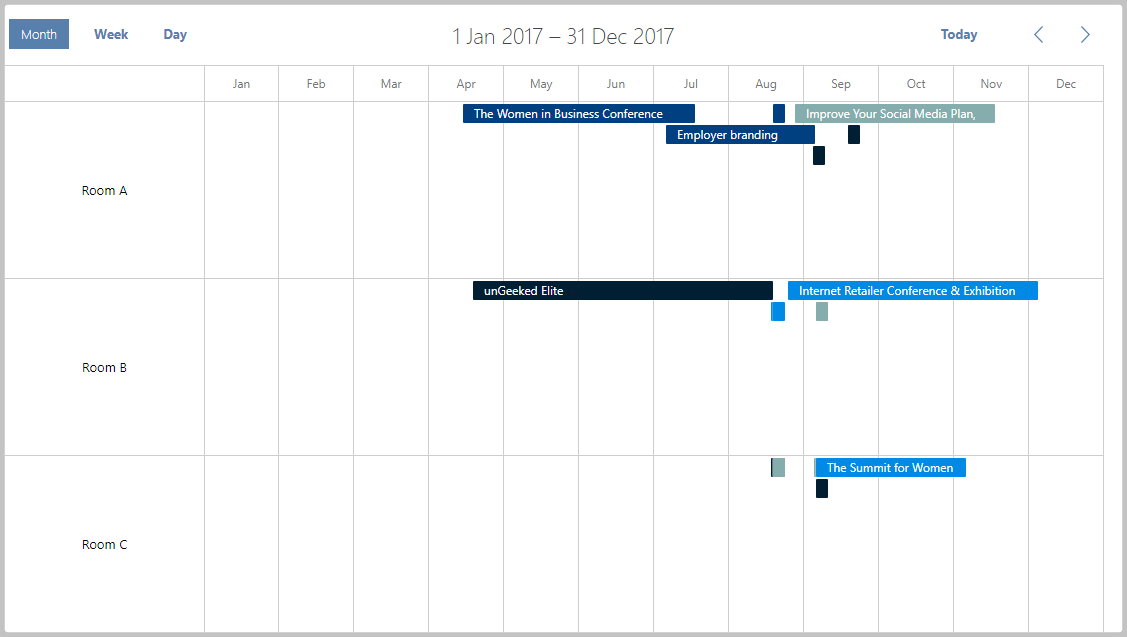
Cool, now we have a nice blue tool for travelling between timelines.
Conclusion
You’ve done it, you have a tool to view timelines from different perspectives by zooming. Time is not so different from space after all! This can be useful and convenient for scheduling apps, especially if they are full of events and your end-users would like to effortlessly zoom in and out of timelines to see both the details and the big picture. If you have any cool ideas of how to enhance Scheduler with some more useful features, I’ll be happy to hear from you. See ya!
Written by Asta Vebraite, a tech writer at DHTMLX